Tweet
Tweet
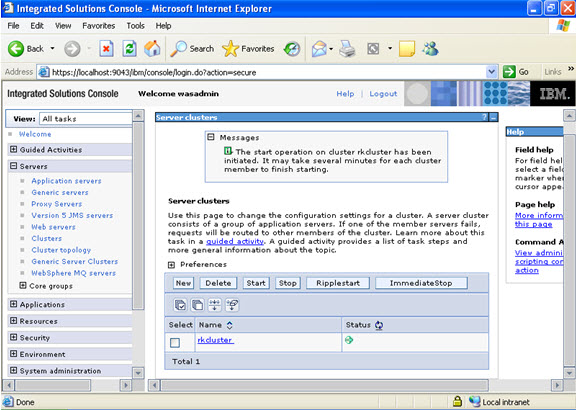
Websphere HTTP plugin failover in a clustered environment
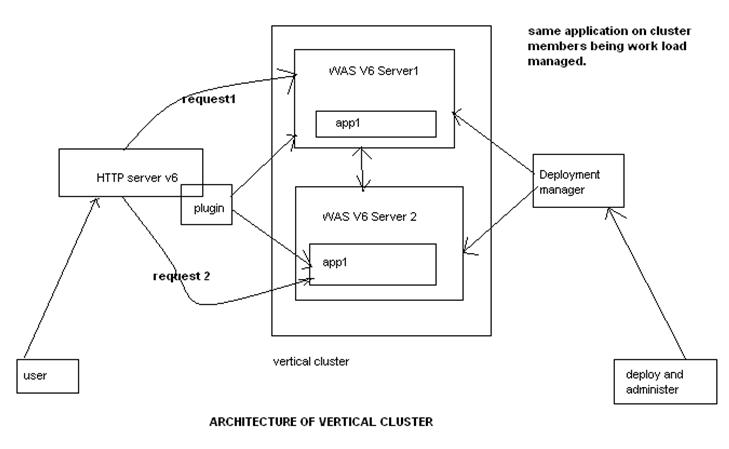
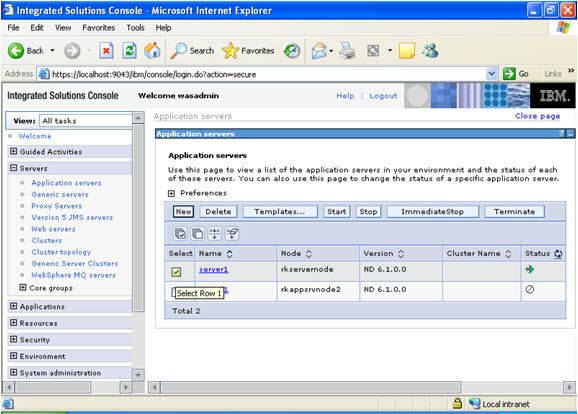
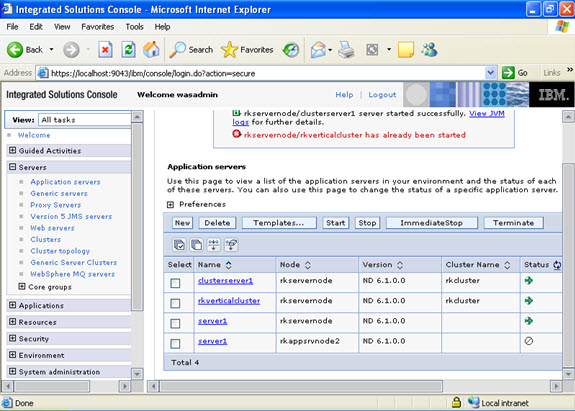
We have a Websphere 6.1 vertical cluster i.e 2 JVMs in a single physical machine with IBM HTTP server.
Problem : Users complained Http server is not properly failing connections when one of the JVM is hung/not responding
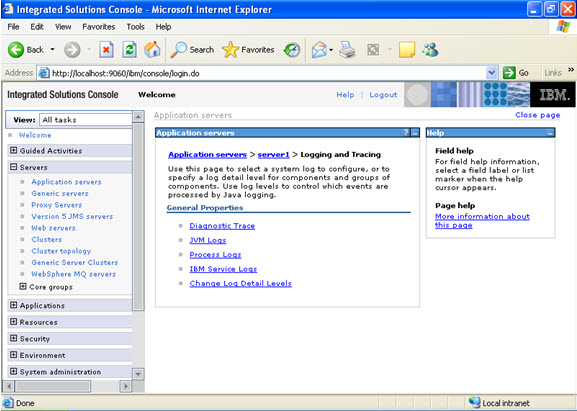
Background : In clustered IBM WebSphere Application Server environments, the HTTP plug-in has the ability to provide failover in the event the HTTP plug-in is no longer able to send requests to a particular cluster member. By default, there are several conditions under which the HTTP plug-in will mark a particular cluster member down and failover client requests to another cluster member that is still able to receive connections. They are listed as follows:
- The HTTP plug-in is unable to establish a connection to a cluster member’s Application Server transport.
- The HTTP plug-in detects a newly connected socket that was prematurely closed by a cluster member during an active read or write.
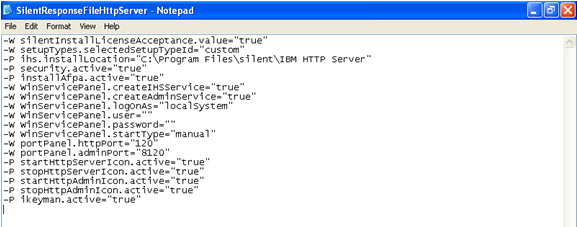
There are several configurable settings in the plugin-cfg.xml that can be tuned to affect how quickly the HTTP plug-in will mark a cluster member down and failover to another cluster member.
Sample $HTTP_HOME/Plugins/config/Plugin-cfg.xml file
<ServerCluster CloneSeparatorChange=”false” GetDWLMTable=”false” IgnoreAffinityRequests=”true” LoadBalance=”Round Robin” Name=”server1_cluster” PostBufferSize=”64″ PostSizeLimit=”-1″ RemoveSpecialHeaders=”true” RetryInterval=”60″>
<Server CloneID=”14l574lkv” ConnectTimeout=”0″ ExtendedHandshake=”false” LoadBalanceWeight=”2″ MaxConnections=”-1″ Name=”Server1_Node01_ihs_member1″ ServerIOTimeout=”0″ WaitForContinue=”false”>
<Transport Hostname=”Server1″ Port=”9080″ Protocol=”http”/>
<Transport Hostname=”Server1″ Port=”9443″ Protocol=”https”>
<Property Name=”keyring” Value=”/opt/IBM/WebSphere/Plugins/config/ihs/plugin-key.kdb”/>
</Transport>
</Server>
<Server CloneID=”14l574mci” ConnectTimeout=”0″ ExtendedHandshake=”false” LoadBalanceWeight=”2″ MaxConnections=”-1″ Name=”Server1_Node01_ihs_member2″ ServerIOTimeout=”0″ WaitForContinue=”false”>
<Transport Hostname=”Server1″ Port=”9081″ Protocol=”http”/>
<Transport Hostname=”Server1″ Port=”9444″ Protocol=”https”>
<Property Name=”keyring” Value=”/opt/IBM/WebSphere/Plugins/config/ihs/plugin-key.kdb”/>
</Transport>
</Server>
<PrimaryServers>
<Server Name=”Server1_Node01_ihs_member1″/>
<Server Name=”Server1_Node01_ihs_member2″/>
</PrimaryServers>
</ServerCluster>
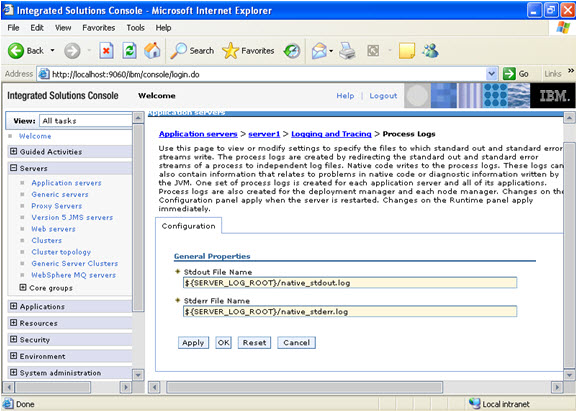
ConnectTimeout Setting:
It is possible to add an attribute to the Server element called ConnectTimeout, which makes the plug-in use a non-blocking connect. Setting ConnectTimeout to a value of 0 is equal to not specifying the ConnectTimeout attribute, that is, the plug-in performs a blocking connect and waits until the operating system times out. Set this attribute to an integer value greater than zero to determine how long the plug-in should wait for a response when attempting to connect to a server. A setting of 10 will mean that the plug-in waits for ten seconds to time out.
Without ConnectTimeout http server will have to wait for OS timeout interval which will run into several minutes. This setting is very similar to ORACLE RAC VIP settings where oracle uses VIPs to detect timeouts/failover quickly over using OS or network interval.
ServerIOTimeout:
The ServerIOTimeout attribute of a server element enables the HTTP plug-in to set a time out value, in seconds, for sending requests to and reading responses from a cluster member. If a value is not set for the ServerIOTimeout attribute, the HTTP plug-in, by default, uses blocked I/O to write request to and read responses from the cluster member until the TCP connection times out.
RetryInterval:
An integer specifying the length of time that should elapse from the time that a server is marked down to the time that the HTTP plug-in will retry a connection. The default is 60 seconds.
As you can see , both settings ConnectTimeout & ServerIOTimeout are not set in this environment. For additional details visit http://www-01.ibm.com/support/docview.wss?uid=swg21219808


![clip_image002[4]](http://www.oracledbasupport.co.uk/wp-content/uploads/2010/05/clip-image0024.jpg "clip_image002[4]")
![clip_image004[4]](http://www.oracledbasupport.co.uk/wp-content/uploads/2010/05/clip-image0044.jpg "clip_image004[4]")
![clip_image006[4]](http://www.oracledbasupport.co.uk/wp-content/uploads/2010/05/clip-image0064.jpg "clip_image006[4]")
![clip_image010[4]](http://www.oracledbasupport.co.uk/wp-content/uploads/2010/05/clip-image0104.jpg "clip_image010[4]")
![clip_image012[4]](http://www.oracledbasupport.co.uk/wp-content/uploads/2010/05/clip-image0124.jpg "clip_image012[4]")


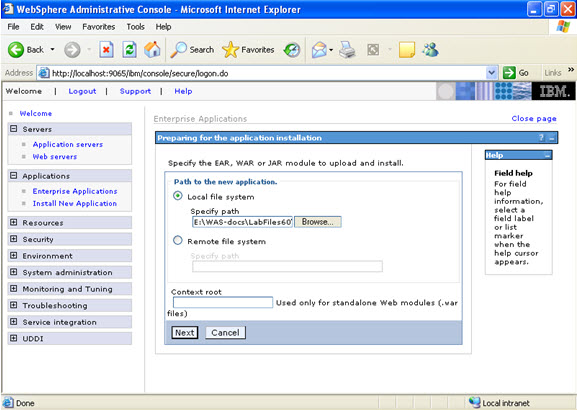
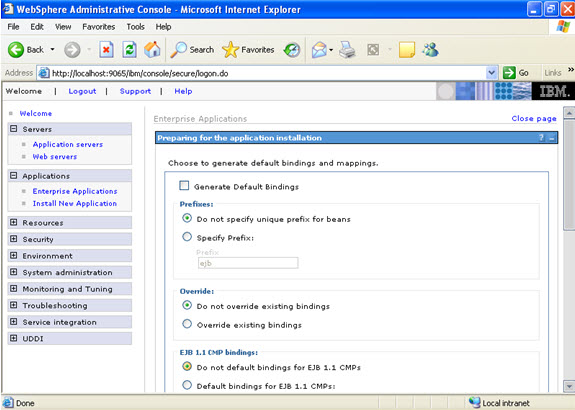
 Click on next.
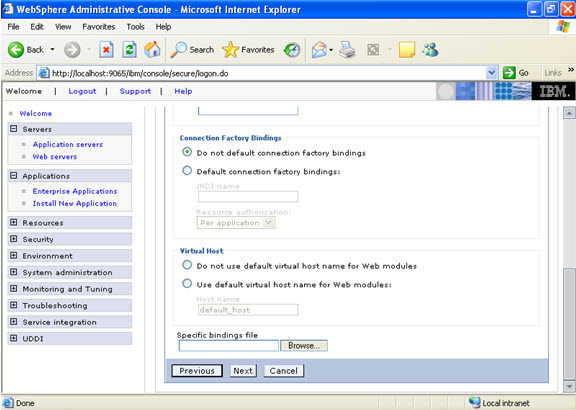
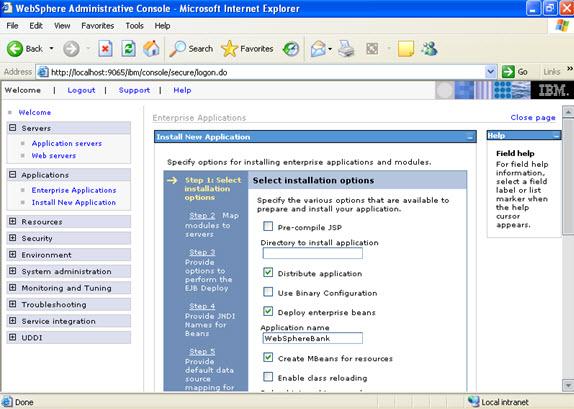
 Click on next. NOW, select the modules and select the application servers where you want to install the particular application so that the corresponding modules are installed on that particular servers.
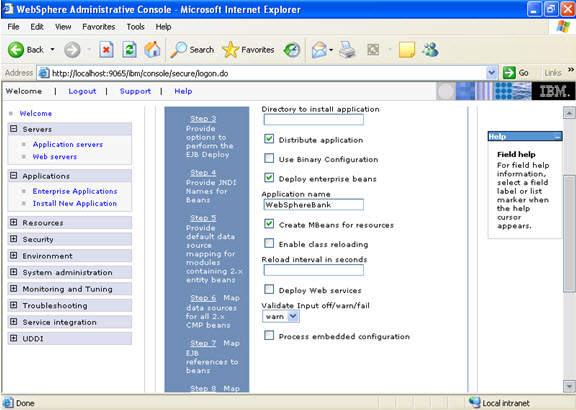
 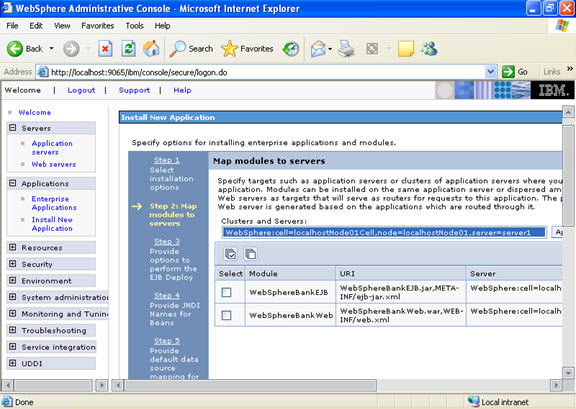 Click on next Now select the database that you want to use.
 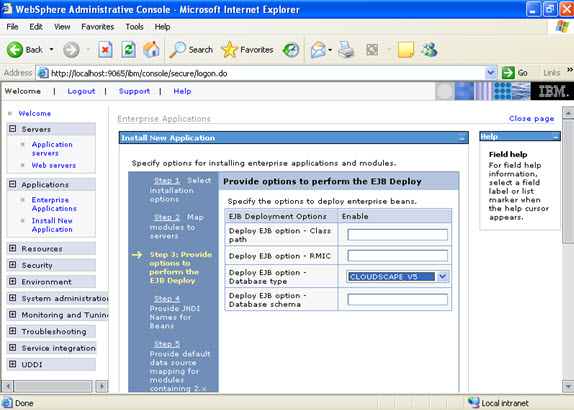 Step 4 Each none message driven bean in the application should be bound to the Java naming and directory interface.
 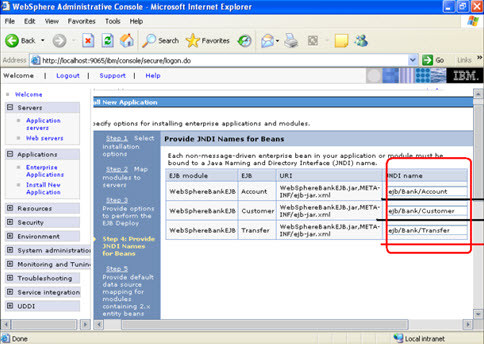 Step 5
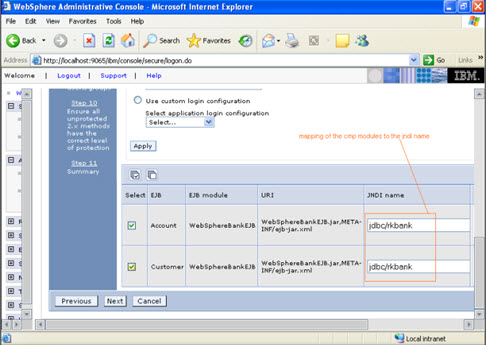
 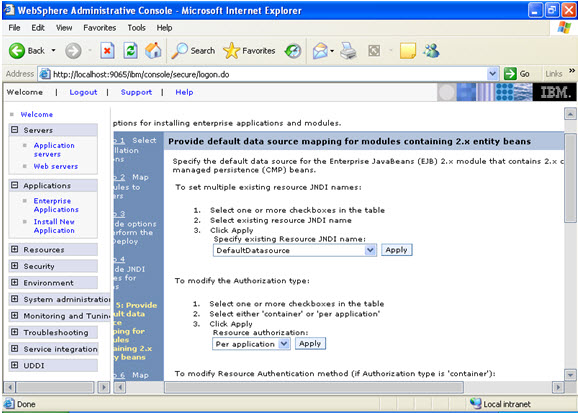 In the step 5 same screen only, You are mapping the modules to the entity beans. Now you have to specify the jndi name
 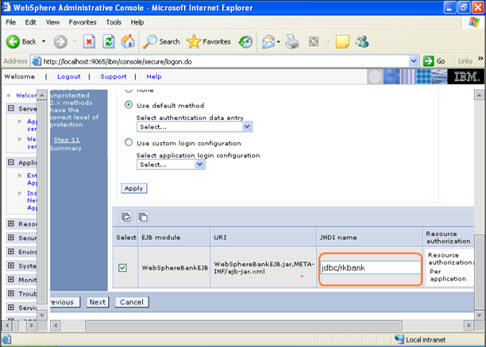 STEP 6 In this step, you have to map the modules to the cmp beans.
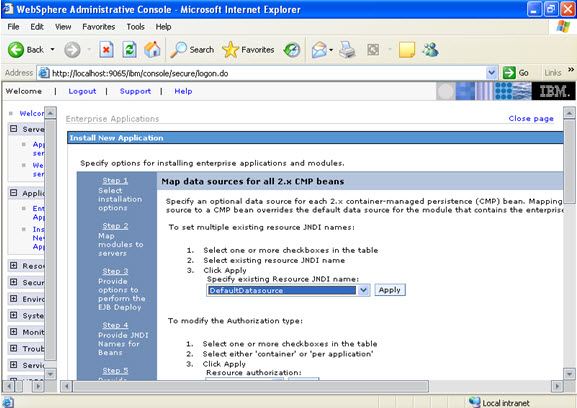
 Step 7
 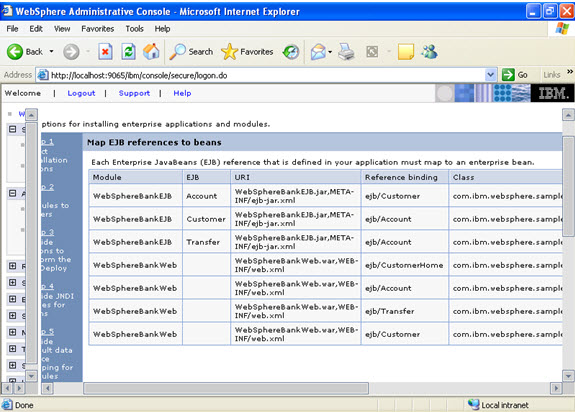 Step 8
 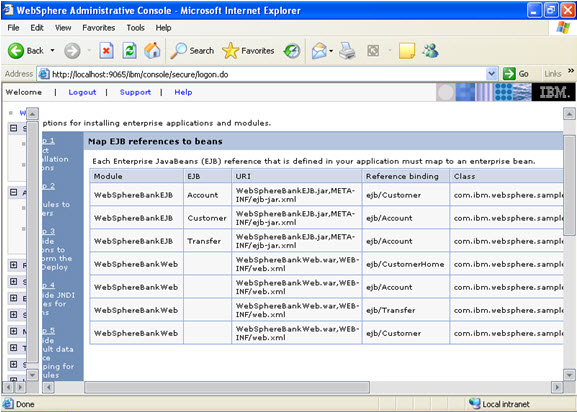 Step 9 Now there are two roles that were specified in the application. There is a tab to look up users. Now you can select the tab and loop up for the users and you can assign the particular users for that module.
 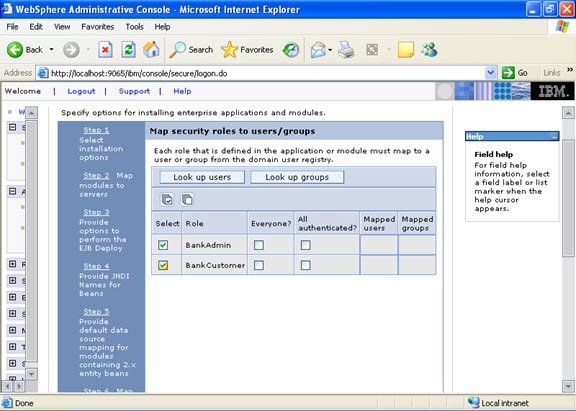 When you click on the tab for look up users: Here in my system there are no users, but it will show a list of users where you can select.
 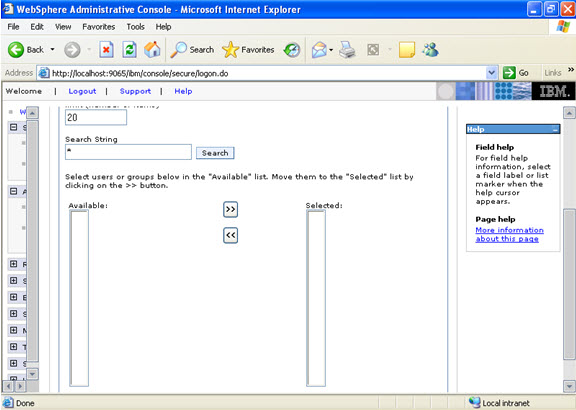 I have selected every one in the previous screen. Step 10 Select the role.
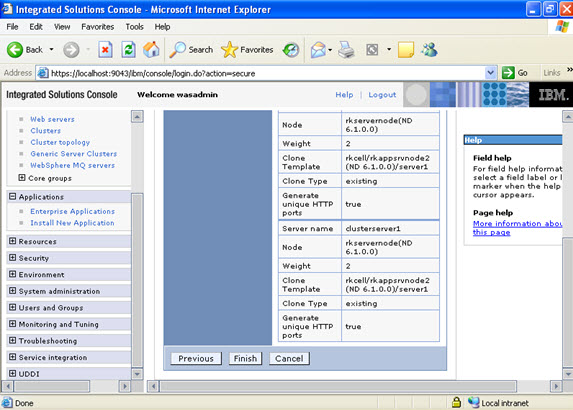
 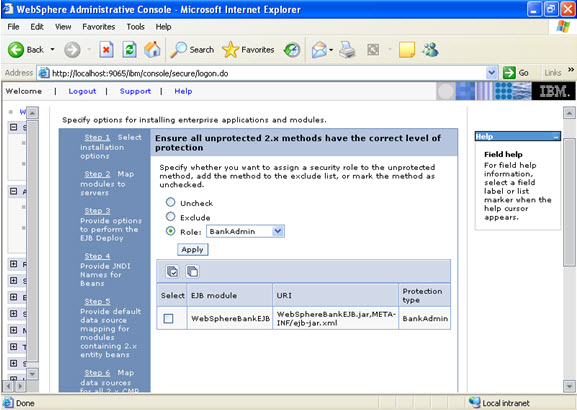 This is the summary of the settings that you have made.
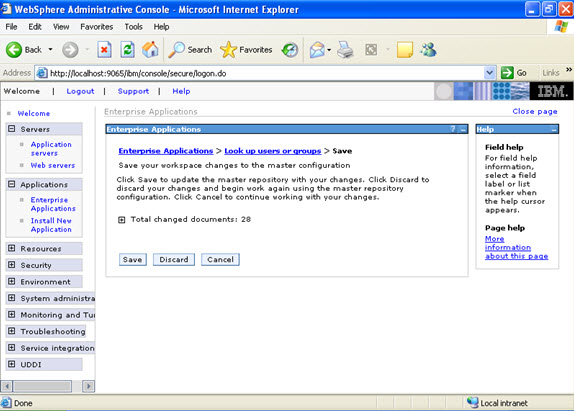
 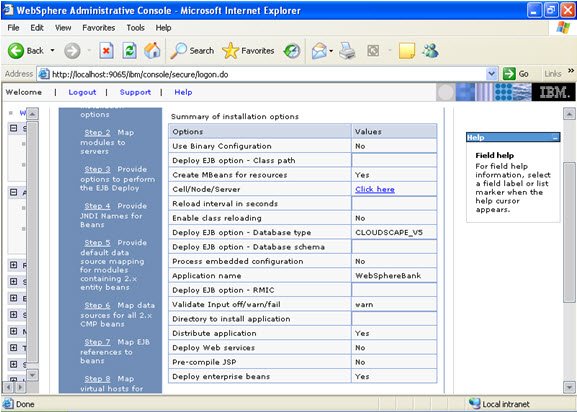 And click Finish.
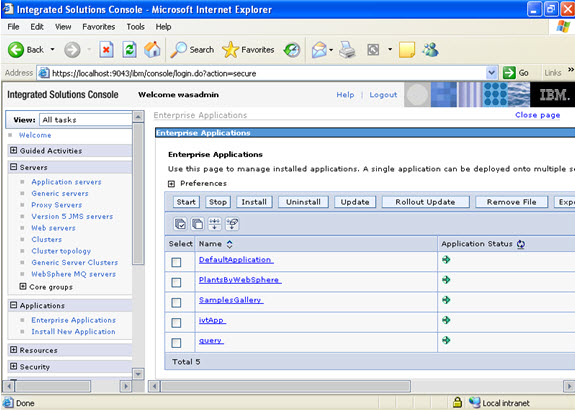
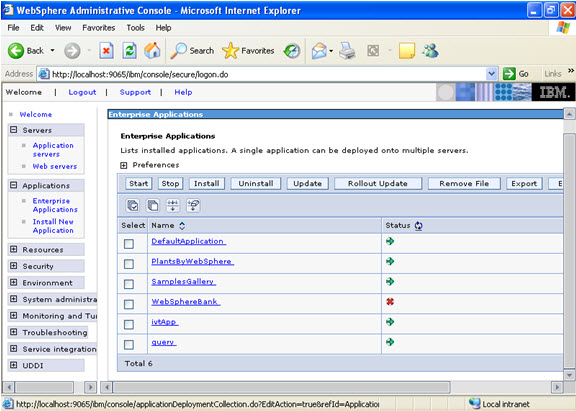 Now select the application and start.
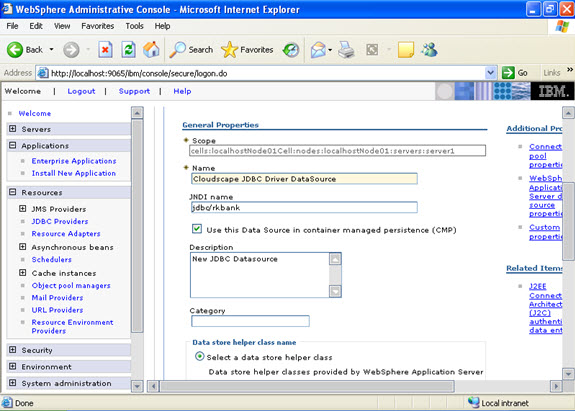
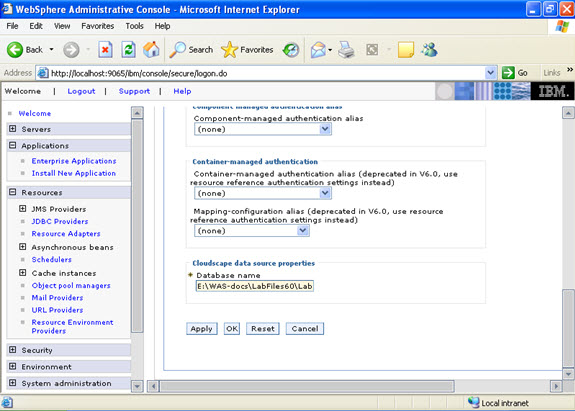
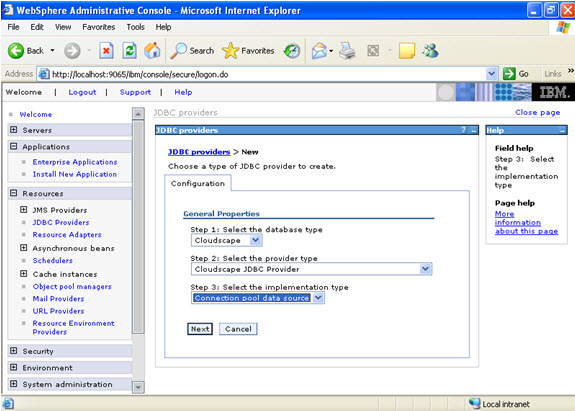 Give the name:
 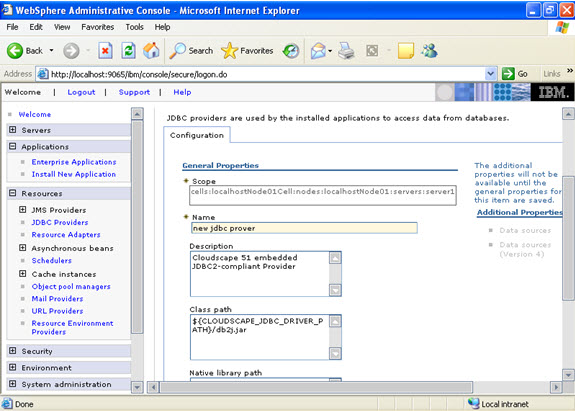 Select data sources -> new
 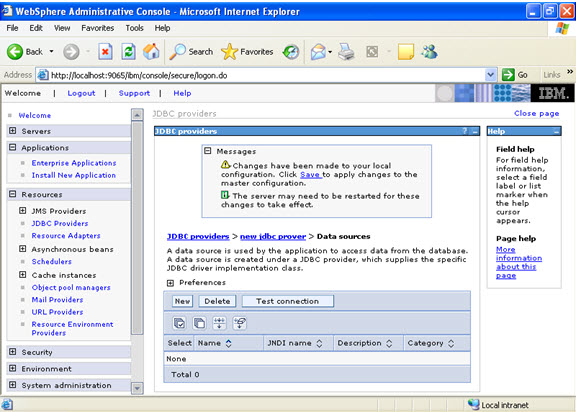 Click new, and provide the address of the database and name of the jndi.