Cloning Oracle Clusterware (Applicable only to 11.2.0.2.0 and not for any previous Releases)

Posted by Sagar Patil

Cloning is the process of copying an existing Oracle installation to a different location and then updating the copied installation to work in the new environment.

The following list describes some situations in which cloning is useful:

  • Cloning provides a way to prepare a Oracle Clusterware home once and deploy it to many hosts simultaneously. You can complete the installation in silent mode, as a noninteractive process. You do not need to use a graphical user interface (GUI) console, and you can perform cloning from a Secure Shell (SSH) terminal session, if required.
  • Cloning enables you to create a new installation (copy of a production, test, or development installation) with all patches applied to it in a single step. Once you have performed the base installation and applied all patch sets and patches on the source system, the clone performs all of these individual steps as a single procedure. This is in contrast to going through the installation process to perform the separate steps to install, configure, and patch the installation on each node in the cluster.
  • Installing Oracle Clusterware by cloning is a quick process. For example, cloning an Oracle Clusterware home to a new cluster with more than two nodes requires a few minutes to install the Oracle software, plus a few minutes more for each node (approximately the amount of time it takes to run the root.sh script).
  • Cloning provides a guaranteed method of repeating the same Oracle Clusterware installation on multiple clusters.

The steps to create a new cluster through cloning are as follows:

Prepare the new cluster nodes
Deploy Oracle Clusterware on the destination nodes
Run the clone.pl script on each destination node
Run the orainstRoot.sh script on each node
Run the CRS_home/root.sh script
Run the configuration assistants and the Oracle Cluster Verify utility

Step 1: Prepare Oracle Clusterware Home for Cloning
Install the Oracle Clusterware 11g Release 1 (11.2.0.2.0).
Install any patches that are required (for example, 11.2.0.2.n, if necessary.
Apply one-off patches, if necessary.

Step 2   Shutdown Oracle Clusterware
[root@RAC1 root]# crsctl stop crs

Step 3   Create a Gold copy of Oracle Clusterware Installation
cd /opt/app/grid/product/11.2/grid_1
tar -czvf /mnt/backup/CRS_build_gold_image_rac02a2.tgz grid_1

Step 4   Copy Oracle Clusterware on the destination nodes
[root@rac02a1 backup]# scp CRS_build_gold_image_rac02a1.tgz  oracle@RAC1:/opt/app/grid/product/11.2
Warning: Permanently added ‘RAC1,192.168.31.120’ (RSA) to the list of known hosts.
oracle@RAC1’s password:
CRS_build_gold_image_rac02a1.tgz                         100%  987MB  17.3MB/s   00:57

Step 5   Remove unnecessary files from the copy of the Oracle Clusterware home
The Oracle Clusterware home contains files that are relevant only to the source node, so you can remove the unnecessary files from the copy in the log, crs/init, racg/dump, srvm/log, and cdata directories. The following example for Linux and UNIX systems shows the commands you can run to remove unnecessary files from the copy of the Oracle Clusterware home:

[root@node1 root]# cd /opt/app/grid/product/11.2/grid_1
[root@node1 crs]# rm -rf ./opt/app/grid/product/11.2/grid_1/log/hostname
[root@node1 crs]# find . -name ‘*.ouibak’ -exec rm {} \;
[root@node1 crs]# find . -name ‘*.ouibak.1’ -exec rm {} \;
[root@node1 crs]# rm -rf root.sh*
[root@node1 crs]# cd cfgtoollogs
[root@node1 cfgtoollogs]# find . -type f -exec rm -f {} \;

Step 6  Deploy Oracle Clusterware on the destination nodes (RUN it at EACH NODE ****)
Change the ownership of all files to oracle:oinstall group, and create a directory for the Oracle Inventory

[root@node1 crs]# chown -R oracle:oinstall /opt/app/grid/product/11.2/grid_1
[root@node1 crs]# mkdir -p /opt/app/oracle/oraInventory/
[root@node1 crs]# chown oracle:oinstall /opt/app/oracle/oraInventory/

Goto $GRID_HOME/clone/bin directory on each destination node and run clone.pl script  which performs main Oracle Clusterware cloning tasks
$perl clone.pl -silent ORACLE_BASE=/opt/app/oracle ORACLE_HOME=/opt/app/grid/product/11.2/grid_1 ORACLE_HOME_NAME=OraHome1Grid INVENTORY_LOCATION=/opt/app/oracle/oraInventory

[oracle@RAC1 bin]$ perl clone.pl -silent ORACLE_BASE=/opt/app/oracle ORACLE_HOME=/opt/app/grid/product/11.2/grid_1 ORACLE_HOME_NAME=OraHome1Grid INVENTORY_LOCATION=/opt/app/oracle/oraInventory
./runInstaller -clone -waitForCompletion  “ORACLE_BASE=/opt/app/oracle” “ORACLE_HOME=/opt/app/grid/product/11.2/grid_1” “ORACLE_HOME_NAME=OraHome1Grid” “INVENTORY_LOCATION=/opt/app/oracle/oraInventory” -silent -noConfig -nowait
Starting Oracle Universal Installer…
Checking swap space: must be greater than 500 MB.   Actual 1983 MB    Passed
Preparing to launch Oracle Universal Installer from /tmp/OraInstall2011-04-01_05-05-56PM. Please wait …Oracle Universal Installer, Version 11.2.0.2.0 Production
Copyright (C) 1999, 2010, Oracle. All rights reserved.

You can find the log of this install session at:
/opt/app/oracle/oraInventory/logs/cloneActions2011-04-01_05-05-56PM.log
………………………………………………………………………………………. 100% Done.
Installation in progress (Friday, 1 April 2011 17:06:08 o’clock BST)
………………………………………………………………72% Done.
Install successful
Linking in progress (Friday, 1 April 2011 17:06:10 o’clock BST)
Link successful
Setup in progress (Friday, 1 April 2011 17:06:50 o’clock BST)
…………….                                                100% Done.
Setup successful
End of install phases.(Friday, 1 April 2011 17:07:00 o’clock BST)
WARNING:
The following configuration scripts need to be executed as the “root” user.
/opt/app/grid/product/11.2/grid_1/root.sh

To execute the configuration scripts:
1. Open a terminal window
2. Log in as “root”
3. Run the scripts

Run the script on the local node.

The cloning of OraHome1Grid was successful. Please check ‘/opt/app/oracle/oraInventory/logs/cloneActions2011-04-01_05-05-56PM.log’ for more details.

Launch the Configuration Wizard
[oracle@RAC2 bin]$ nslookup rac04scan
Server:         10.20.11.11
Address:        10.20.11.11#53
Name:   rac04scan
Address: 192.168.31.188
Name:   rac04scan
Address: 192.168.31.187
Name:   rac04scan
Address: 192.168.31.189

$ $GRID_HOME/crs/config/config.sh


RUN root.sh screen on NODE A

[root@RAC1 ~]# /opt/app/grid/product/11.2/grid_1/root.sh
Check /opt/app/grid/product/11.2/grid_1/install/root_RAC1_2011-04-04_12-41-24.log for the output of root script


[oracle@RAC1 ~]$ tail -f /opt/app/grid/product/11.2/grid_1/install/root_RAC1_2011-04-04_12-41-24.log

The following environment variables are set as:
ORACLE_OWNER= oracle
ORACLE_HOME=  /opt/app/grid/product/11.2/grid_1
Entries will be added to the /etc/oratab file as needed by
Database Configuration Assistant when a database is created
Finished running generic part of root script.
Now product-specific root actions will be performed.
Relinking oracle with rac_on option
Using configuration parameter file: /opt/app/grid/product/11.2/grid_1/crs/install/crsconfig_params
LOCAL ADD MODE
Creating OCR keys for user ‘root’, privgrp ‘root’..
Operation successful.
OLR initialization – successful
root wallet
root wallet cert
root cert export
peer wallet
profile reader wallet
pa wallet
peer wallet keys
pa wallet keys
peer cert request
pa cert request
peer cert
pa cert
peer root cert TP
profile reader root cert TP
pa root cert TP
peer pa cert TP
pa peer cert TP
profile reader pa cert TP
profile reader peer cert TP
peer user cert
pa user cert
Adding daemon to inittab
ACFS-9459: ADVM/ACFS is not supported on this OS version: ‘Linux 2.4’
ACFS-9201: Not Supported
ACFS-9459: ADVM/ACFS is not supported on this OS version: ‘Linux 2.4’
CRS-2672: Attempting to start ‘ora.mdnsd’ on ‘RAC1’
CRS-2676: Start of ‘ora.mdnsd’ on ‘RAC1’ succeeded
CRS-2672: Attempting to start ‘ora.gpnpd’ on ‘RAC1’
CRS-2676: Start of ‘ora.gpnpd’ on ‘RAC1’ succeeded
CRS-2672: Attempting to start ‘ora.cssdmonitor’ on ‘RAC1’
CRS-2672: Attempting to start ‘ora.gipcd’ on ‘RAC1’
CRS-2676: Start of ‘ora.cssdmonitor’ on ‘RAC1’ succeeded
CRS-2676: Start of ‘ora.gipcd’ on ‘RAC1’ succeeded
CRS-2672: Attempting to start ‘ora.cssd’ on ‘RAC1’
CRS-2672: Attempting to start ‘ora.diskmon’ on ‘RAC1’
CRS-2676: Start of ‘ora.diskmon’ on ‘RAC1’ succeeded
CRS-2676: Start of ‘ora.cssd’ on ‘RAC1’ succeeded
clscfg: -install mode specified
Successfully accumulated necessary OCR keys.
Creating OCR keys for user ‘root’, privgrp ‘root’..
Operation successful.
Now formatting voting disk: /mnt/crs1/vdisk/rac04vdsk1.
Now formatting voting disk: /mnt/crs2/vdisk/rac04vdsk2.
Now formatting voting disk: /mnt/crs3/vdisk/rac04vdsk3.
CRS-4603: Successful addition of voting disk /mnt/crs1/vdisk/rac04vdsk1.
CRS-4603: Successful addition of voting disk /mnt/crs2/vdisk/rac04vdsk2.
CRS-4603: Successful addition of voting disk /mnt/crs3/vdisk/rac04vdsk3.
##  STATE    File Universal Id                File Name Disk group
—  —–    —————–                ——— ———
1. ONLINE   a77b9ecfd10c4f8abf9dae8e403458e6 (/mnt/crs1/vdisk/rac04vdsk1) []
2. ONLINE   3a2c370ffe014f20bff0673b01d8164c (/mnt/crs2/vdisk/rac04vdsk2) []
3. ONLINE   8597ee290c994fd8bf23a4b3c97a98bb (/mnt/crs3/vdisk/rac04vdsk3) []
Located 3 voting disk(s).
ACFS-9459: ADVM/ACFS is not supported on this OS version: ‘Linux 2.4’
ACFS-9201: Not Supported
ACFS-9459: ADVM/ACFS is not supported on this OS version: ‘Linux 2.4’
ACFS-9201: Not Supported
Preparing packages for installation…
cvuqdisk-1.0.9-1
Configure Oracle Grid Infrastructure for a Cluster … succeeded

RUN root.sh screen on NODE B

[root@RAC2 ~]# /opt/app/grid/product/11.2/grid_1/root.sh
Check /opt/app/grid/product/11.2/grid_1/install/root_RAC2_2011-04-04_12-50-53.log for the output of root script

[oracle@RAC2 ~]$ tail -f /opt/app/grid/product/11.2/grid_1/install/root_RAC2_2011-04-04_12-50-53.log
Entries will be added to the /etc/oratab file as needed by
Database Configuration Assistant when a database is created
Finished running generic part of root script.
Now product-specific root actions will be performed.
Relinking oracle with rac_on option
Using configuration parameter file: /opt/app/grid/product/11.2/grid_1/crs/install/crsconfig_params
LOCAL ADD MODE
Creating OCR keys for user ‘root’, privgrp ‘root’..
Operation successful.
OLR initialization – successful
Adding daemon to inittab
ACFS-9459: ADVM/ACFS is not supported on this OS version: ‘Linux 2.4’
ACFS-9201: Not Supported
ACFS-9459: ADVM/ACFS is not supported on this OS version: ‘Linux 2.4’
CRS-4402: The CSS daemon was started in exclusive mode but found an active CSS daemon on node RAC1, number 1, and is terminating An active cluster was found during exclusive startup, restarting to join the cluster

[root@RAC2 ~]# /opt/app/grid/product/11.2/grid_1/bin/crsctl check crs
CRS-4638: Oracle High Availability Services is online
CRS-4537: Cluster Ready Services is online
CRS-4529: Cluster Synchronization Services is online
CRS-4533: Event Manager is online

[root@RAC1 ~]# /opt/app/grid/product/11.2/grid_1/bin/crsctl check crs
CRS-4638: Oracle High Availability Services is online
CRS-4537: Cluster Ready Services is online
CRS-4529: Cluster Synchronization Services is online
CRS-4533: Event Manager is online

Step 6. Locating and Viewing Log Files Generated During Cloning
The cloning script runs multiple tools, each of which can generate log files.
After the clone.pl script finishes running, you can view log files to obtain more information about the status of your cloning procedures. Table 4-4 lists the log files that are generated during cloning that are the key log files for diagnostic purposes.

Ref : http://download.oracle.com/docs/cd/E11882_01/rac.112/e16794/clonecluster.htm

11g RAC | Using Duplicate target database 11g Active Database option

Posted by Sagar Patil

I have a 2 Node RAC Standby database (STDBY) . I need to replicate it as a Load TEST database (LDTEST) in a read/write mode.

I will run thru following steps:
1. Preparing the Auxiliary Instance
2. Starting and Configuring RMAN Before Duplication
3. Duplicating a Database

1. Preparing the Auxiliary Instance

Step 1: Create an Oracle Password File for the Auxiliary Instance

When using FROM ACTIVE DATABASE option the source database instance which is the database instance to which RMAN is connected as TARGET connects directly to the auxiliary database instance.  This connection requires a password file with the same SYSDBA password.

[oracle@Node3]$ pwd
/mnt/data/oradata/LDTEST   — The password file placed at Clustered storage.
[oracle@Node3]$ cp orapwSTDBY ../LDTEST
[oracle@Node3]$ cd ../LDTEST
[oracle@Node3]$ ls -lrt
total 4
-rw-r—– 1 oracle oinstall 1536 May 3 12:57 orapwSTDBY

[oracle@Node3]$ mv orapwSTDBY orapwLDTTEST
[oracle@Node3]$ ls -lrt
total 4
-rw-r—– 1 oracle oinstall 1536 May 3 12:57 orapwLDTTEST

Step 2: Establish Oracle Net Connectivity to the Auxiliary Instance

When duplicating from an active database, you must first have connected as SYSDBA to the auxiliary instance by means of a net service name.
Add new database instance details $ORACLE_HOME/netaork/admin/listener.ora

(SID_LIST =
(SID_DESC =
(GLOBAL_DBNAME = LDTEST) # Replicated DB
(ORACLE_HOME = /opt/app/oracle/product/11.2/db_1)
(SID_NAME =LDTTEST1)
)

[oracle@Node3 admin]$ lsnrctl reload
[oracle@Node3 admin]$ lsnrctl status
Service “LDTEST” has 1 instance(s).
Instance “LDTTEST1”, status UNKNOWN, has 1 handler(s) for this service…
Service “STDBY_DGMGRL” has 1 instance(s).
Instance “STDBY1”, status UNKNOWN, has 1 handler(s) for this service…
The command completed successfully

Add following dedicated entry at /opt/app/oracle/product/11.2/db_1/network/admin

LDTTEST1=
(DESCRIPTION =
(ADDRESS = (PROTOCOL = TCP)(HOST = Node3scan)(PORT = 1529))
(CONNECT_DATA =
(SERVER = DEDICATED)
(SERVICE_NAME = LDTEST)
)
)

[oracle@Node3 admin]$ tnsping LDTTEST1
TNS Ping Utility for Linux: Version 11.2.0.2.0 – Production on 03-MAY-2011
Attempting to contact (DESCRIPTION = (ADDRESS = (PROTOCOL = TCP)(HOST = Node3scan)(PORT = 1529)) (CONNECT_DATA = (SERVER = DEDICATED) (SERVICE_NAME = LDTEST)))
OK (10 msec)

Step 3: Create an Initialization Parameter File for An Auxiliary Instance

Change directories at pfile to point to new database directory structure
** : set *.cluster_database=false
Let’s create dump directories needed. The easiest way is to copy structure of directory tree from existing instance.

[oracle@Node3 STDBY]$ pwd
/opt/app/oracle/diag/rdbms/STDBY
find . -type d -exec mkdir /opt/app/oracle/diag/rdbms/LDTEST/{} \;
“du -a” showed right directory structure created
84 ./LDTTEST1/trace
4 ./LDTTEST1/sweep
4 ./LDTTEST1/metadata
4 ./LDTTEST1/alert
4 ./LDTTEST1/stage
4 ./LDTTEST1/hm
4 ./LDTTEST1/incident
136 ./LDTTEST1

SQL> create pfile=’$ORACLE_HOME/dbs/initLDTTEST1.ora’ from spfile;

Edit pfile and make directory location changes required for new Database.

Step 4: Start Auxiliary Instance with SQL*Plus

SQL> startup nomount;
ORA-32004: obsolete or deprecated parameter(s) specified for RDBMS instance
ORACLE instance started.
Total System Global Area 9152860160 bytes
Fixed Size 2234056 bytes
Variable Size 6945769784 bytes
Database Buffers 2181038080 bytes
Redo Buffers 23818240 bytes
SQL> show parameter db_name
NAME TYPE VALUE
———————————— ———– ——————————
db_name string LDTTEST1

2. Starting and Configuring RMAN Before Duplication
Step 1: Start RMAN and Connect to the Database Instances
Step 2: Mount or Open the Source Database
Step 1: Start RMAN and Connect to the Database Instances

RMAN> connect target sys/sysgsadm@STDBY
connected to target database: PROD (DBID=4020163110)
RMAN> CONNECT AUXILIARY SYS/sysgsadm@LDTTEST1
connected to auxiliary database: LDTTEST1 (not mounted)

Step 2: Mount or Open the Source Database

Before beginning RMAN duplication, mount or open the source database it if it is not already mounted or open.

3. Duplicating a Database

Run following RMAN command

RMAN> DUPLICATE TARGET DATABASE TO LDTEST
FROM ACTIVE DATABASE
DB_FILE_NAME_CONVERT ‘/PROD’,’/LDTEST’
PFILE=’/opt/app/oracle/product/11.2/db_1/dbs/initLDTTEST1.ora’;

Starting Duplicate Db at 03-MAY-11
using target database control file instead of recovery catalog
allocated channel: ORA_AUX_DISK_1
channel ORA_AUX_DISK_1: SID=392 device type=DISK
allocated channel: ORA_AUX_DISK_2
channel ORA_AUX_DISK_2: SID=490 device type=DISK
allocated channel: ORA_AUX_DISK_3
channel ORA_AUX_DISK_3: SID=586 device type=DISK
contents of Memory Script:
{
sql clone “create spfile from memory”;
}
executing Memory Script
sql statement: create spfile from memory
contents of Memory Script:
{
shutdown clone immediate;
startup clone nomount;
}
executing Memory Script
Oracle instance shut down
connected to auxiliary database (not started)
Oracle instance started
Total System Global Area 9152860160 bytes
Fixed Size 2234056 bytes
Variable Size 6979324216 bytes
Database Buffers 2147483648 bytes
Redo Buffers 23818240 bytes
contents of Memory Script:
{
sql clone “alter system set db_name =
”PROD” comment=
”Modified by RMAN duplicate” scope=spfile”;
sql clone “alter system set db_unique_name =
”LDTEST” comment=
”Modified by RMAN duplicate” scope=spfile”;
shutdown clone immediate;
startup clone force nomount
backup as copy current controlfile auxiliary format ‘/mnt/data/oradata/LDTEST/control01.ctl’;
restore clone controlfile to ‘/mnt/data/oradata/LDTEST/control02.ctl’ from
‘/mnt/data/oradata/LDTEST/control01.ctl’;
alter clone database mount;
}
executing Memory Script
sql statement: alter system set db_name = ”PROD” comment= ”Modified by RMAN duplicate” scope=spfile
sql statement: alter system set db_unique_name = ”LDTEST” comment= ”Modified by RMAN duplicate” scope=spfile
Oracle instance shut down
Oracle instance started
Total System Global Area 9152860160 bytes
Fixed Size 2234056 bytes
Variable Size 6979324216 bytes
Database Buffers 2147483648 bytes
Redo Buffers 23818240 bytes
Starting backup at 03-MAY-11
allocated channel: ORA_DISK_1
channel ORA_DISK_1: SID=300 instance=STDBY1 device type=DISK
allocated channel: ORA_DISK_2
channel ORA_DISK_2: SID=396 instance=STDBY1 device type=DISK
allocated channel: ORA_DISK_3
channel ORA_DISK_3: SID=495 instance=STDBY1 device type=DISK
channel ORA_DISK_1: starting datafile copy
copying current control file
output file name=/opt/app/oracle/product/11.2/db_1/dbs/snapcf_STDBY1.f tag=TAG20110503T162228 RECID=13 STAMP=750183751
channel ORA_DISK_1: datafile copy complete, elapsed time: 00:00:07
Finished backup at 03-MAY-11
Starting restore at 03-MAY-11
allocated channel: ORA_AUX_DISK_1
channel ORA_AUX_DISK_1: SID=392 device type=DISK
allocated channel: ORA_AUX_DISK_2
channel ORA_AUX_DISK_2: SID=490 device type=DISK
allocated channel: ORA_AUX_DISK_3
channel ORA_AUX_DISK_3: SID=586 device type=DISK
channel ORA_AUX_DISK_2: skipped, AUTOBACKUP already found
channel ORA_AUX_DISK_3: skipped, AUTOBACKUP already found
channel ORA_AUX_DISK_1: copied control file copy
Finished restore at 03-MAY-11
database mounted
contents of Memory Script:
{
set newname for datafile 1 to
“/mnt/data/oradata/LDTEST/system01.dbf”;
set newname for datafile 2 to
“/mnt/data/oradata/LDTEST/sysaux01.dbf”;
set newname for datafile 3 to
“/mnt/data/oradata/LDTEST/undotbs01.dbf”;
set newname for datafile 4 to
“/mnt/data/oradata/LDTEST/users01.dbf”;
set newname for datafile 5 to
“/mnt/data/oradata/LDTEST/undotbs02.dbf”;
backup as copy reuse
datafile 1 auxiliary format
“/mnt/data/oradata/LDTEST/system01.dbf” datafile
2 auxiliary format
“/mnt/data/oradata/LDTEST/sysaux01.dbf” datafile
3 auxiliary format
“/mnt/data/oradata/LDTEST/undotbs01.dbf” datafile
4 auxiliary format
“/mnt/data/oradata/LDTEST/users01.dbf” datafile
5 auxiliary format
“/mnt/data/oradata/LDTEST/undotbs02.dbf” datafile
}
executing Memory Script
Starting backup at 03-MAY-11
using channel ORA_DISK_1
using channel ORA_DISK_2
using channel ORA_DISK_3
channel ORA_DISK_1: starting datafile copy
input datafile file number=00002 name=/mnt/data/oradata/PROD/sysaux01.dbf
channel ORA_DISK_2: starting datafile copy
input datafile file number=00001 name=/mnt/data/oradata/PROD/system01.dbf
output file name=/mnt/data/oradata/LDTEST/system01.dbf tag=TAG20110503T162300
channel ORA_DISK_3: datafile copy complete, elapsed time: 00:04:05
channel ORA_DISK_3: starting datafile copy
input datafile file number=00005 name=/mnt/data/oradata/PROD/undotbs02.dbf
output file name=/mnt/data/oradata/LDTEST/sysaux01.dbf tag=TAG20110503T162300
channel ORA_DISK_1: datafile copy complete, elapsed time: 00:06:50
channel ORA_DISK_1: starting datafile copy
input datafile file number=00003 name=/mnt/data/oradata/PROD/undotbs01.dbf
output file name=/mnt/data/oradata/LDTEST/cdc_data01.dbf tag=TAG20110503T162300
channel ORA_DISK_2: datafile copy complete, elapsed time: 00:02:15
channel ORA_DISK_2: starting datafile copy
input datafile file number=00004 name=/mnt/data/oradata/PROD/users01.dbf
output file name=/mnt/data/oradata/LDTEST/undotbs01.dbf tag=TAG20110503T162300
Finished backup at 03-MAY-11
sql statement: alter system archive log current
contents of Memory Script:
{
backup as copy reuse
archivelog like “/mnt/logs/oradata/PROD/arch/2_753_747681489.arc” auxiliary format
“/mnt/logs/oradata/LDTEST/arch/2_753_747681489.arc” archivelog like
“/mnt/logs/oradata/PROD/arch/1_664_747681489.arc” auxiliary format
“/mnt/logs/oradata/LDTEST/arch/1_664_747681489.arc” archivelog like
“/mnt/logs/oradata/PROD/arch/2_754_747681489.arc” auxiliary format
“/mnt/logs/oradata/LDTEST/arch/2_754_747681489.arc” ;
catalog clone archivelog “/mnt/logs/oradata/LDTEST/arch/2_753_747681489.arc”;
catalog clone archivelog “/mnt/logs/oradata/LDTEST/arch/1_664_747681489.arc”;
catalog clone archivelog “/mnt/logs/oradata/LDTEST/arch/2_754_747681489.arc”;
switch clone datafile all;
}
executing Memory Script
Starting backup at 03-MAY-11
using channel ORA_DISK_1
using channel ORA_DISK_2
using channel ORA_DISK_3
channel ORA_DISK_1: starting archived log copy
input archived log thread=2 sequence=753 RECID=782 STAMP=750183649
channel ORA_DISK_2: starting archived log copy
input archived log thread=1 sequence=664 RECID=784 STAMP=750184270
channel ORA_DISK_3: starting archived log copy
input archived log thread=2 sequence=754 RECID=786 STAMP=750184271
output file name=/mnt/logs/oradata/LDTEST/arch/2_753_747681489.arc RECID=0 STAMP=0
channel ORA_DISK_1: archived log copy complete, elapsed time: 00:00:02
output file name=/mnt/logs/oradata/LDTEST/arch/1_664_747681489.arc RECID=0 STAMP=0
channel ORA_DISK_2: archived log copy complete, elapsed time: 00:00:01
output file name=/mnt/logs/oradata/LDTEST/arch/2_754_747681489.arc RECID=0 STAMP=0
channel ORA_DISK_3: archived log copy complete, elapsed time: 00:00:01
Finished backup at 03-MAY-11
cataloged archived log
archived log file name=/mnt/logs/oradata/LDTEST/arch/2_753_747681489.arc RECID=783 STAMP=750184304
cataloged archived log
archived log file name=/mnt/logs/oradata/LDTEST/arch/1_664_747681489.arc RECID=784 STAMP=750184304
cataloged archived log
archived log file name=/mnt/logs/oradata/LDTEST/arch/2_754_747681489.arc RECID=785 STAMP=750184305
datafile 1 switched to datafile copy
input datafile copy RECID=13 STAMP=750184307 file name=/mnt/data/oradata/LDTEST/system01.dbf
datafile 2 switched to datafile copy
input datafile copy RECID=14 STAMP=750184308 file name=/mnt/data/oradata/LDTEST/sysaux01.dbf
datafile 3 switched to datafile copy
input datafile copy RECID=15 STAMP=750184309 file name=/mnt/data/oradata/LDTEST/undotbs01.dbf
datafile 4 switched to datafile copy
input datafile copy RECID=16 STAMP=750184309 file name=/mnt/data/oradata/LDTEST/users01.dbf
datafile 5 switched to datafile copy
input datafile copy RECID=17 STAMP=750184310 file name=/mnt/data/oradata/LDTEST/undotbs02.dbf
contents of Memory Script:
{
set until scn 263980944;
recover
clone database
delete archivelog
;
}
executing Memory Script
executing command: SET until clause
Starting recover at 03-MAY-11
using channel ORA_AUX_DISK_1
using channel ORA_AUX_DISK_2
using channel ORA_AUX_DISK_3
starting media recovery
archived log for thread 1 with sequence 664 is already on disk as file /mnt/logs/oradata/LDTEST/arch/1_664_747681489.arc
archived log for thread 2 with sequence 754 is already on disk as file /mnt/logs/oradata/LDTEST/arch/2_754_747681489.arc
archived log file name=/mnt/logs/oradata/LDTEST/arch/1_664_747681489.arc thread=1 sequence=664
archived log file name=/mnt/logs/oradata/LDTEST/arch/2_754_747681489.arc thread=2 sequence=754
media recovery complete, elapsed time: 00:00:03
Finished recover at 03-MAY-11
Oracle instance started
Total System Global Area 9152860160 bytes
Fixed Size 2234056 bytes
Variable Size 6945769784 bytes
Database Buffers 2181038080 bytes
Redo Buffers 23818240 bytes
sql statement: CREATE CONTROLFILE REUSE SET DATABASE “LDTEST” RESETLOGS ARCHIVELOG
MAXLOGFILES 192
MAXLOGMEMBERS 3
MAXDATAFILES 2048
MAXINSTANCES 32
MAXLOGHISTORY 1168
LOGFILE
GROUP 1 SIZE 50 M ,
GROUP 2 SIZE 50 M
DATAFILE
‘/mnt/data/oradata/LDTEST/system01.dbf’
CHARACTER SET AL32UTF8
sql statement: ALTER DATABASE ADD LOGFILE
INSTANCE ‘i2’
GROUP 3 SIZE 50 M ,
GROUP 4 SIZE 50 M
contents of Memory Script:
{
set newname for tempfile 1 to
“/mnt/data/oradata/LDTEST/temp01.dbf”;
switch clone tempfile all;
catalog clone datafilecopy “/mnt/data/oradata/LDTEST/sysaux01.dbf”,
“/mnt/data/oradata/LDTEST/undotbs01.dbf”,
“/mnt/data/oradata/LDTEST/users01.dbf”,
“/mnt/data/oradata/LDTEST/undotbs02.dbf”,
switch clone datafile all;
}
executing Memory Script
executing command: SET NEWNAME
renamed tempfile 1 to /mnt/data/oradata/LDTEST/temp01.dbf in control file
cataloged datafile copy
datafile copy file name=/mnt/data/oradata/LDTEST/sysaux01.dbf RECID=1 STAMP=750184356
cataloged datafile copy
datafile copy file name=/mnt/data/oradata/LDTEST/undotbs01.dbf RECID=2 STAMP=750184356
cataloged datafile copy
datafile copy file name=/mnt/data/oradata/LDTEST/users01.dbf RECID=3 STAMP=750184356
cataloged datafile copy
datafile copy file name=/mnt/data/oradata/LDTEST/undotbs02.dbf RECID=4 STAMP=750184357
cataloged datafile copy
datafile 2 switched to datafile copy
input datafile copy RECID=1 STAMP=750184356 file name=/mnt/data/oradata/LDTEST/sysaux01.dbf
datafile 3 switched to datafile copy
input datafile copy RECID=2 STAMP=750184356 file name=/mnt/data/oradata/LDTEST/undotbs01.dbf
datafile 4 switched to datafile copy
input datafile copy RECID=3 STAMP=750184356 file name=/mnt/data/oradata/LDTEST/users01.dbf
datafile 5 switched to datafile copy
input datafile copy RECID=4 STAMP=750184357 file name=/mnt/data/oradata/LDTEST/undotbs02.dbf
Reenabling controlfile options for auxiliary database
Executing: alter database add supplemental log data(PRIMARY KEY, UNIQUE) columns
Executing: alter database force logging
contents of Memory Script:
{
Alter clone database open resetlogs;
}
executing Memory Script
database opened
Finished Duplicate Db at 03-MAY-11

The database is now working fine on One Node1, I will have to convert it into a 2 node RAC database.

Create shared spfile for both instances , set CLUSTER_DATABASE to TRUE at spfile/pfile

SQL> alter system set cluster_database=TRUE scope=spfile;
System altered.
SQL> shutdown abort;
ORACLE instance shut down.
[oracle@Node3 dbs]$ cat initLDTTEST1.ora
SPFILE=’/mnt/data/oradata/LDTEST/spfileLDTTEST.ora'[oracle@Node4 dbs]$ cat initLDTTEST2.ora
SPFILE=’/mnt/data/oradata/LDTEST/spfileLDTTEST.ora’

Move password file to clustered shared storage and create soft links from both nodes Node3, Node4 to orapwLDTTEST

[oracle@Node3 dbs]$ ln -s /mnt/data/oradata/LDTEST/orapwLDTTEST orapwLDTTEST2
[oracle@Node3 dbs]$ ln -s /mnt/data/oradata/LDTEST/orapwLDTTEST orapwLDTTEST1
[oracle@Node3 dbs]$ scp initLDTTEST1.ora oracle@Node4:/opt/app/oracle/product/11.2/db_1/dbs
SQL> startup;
ORACLE instance started.
Total System Global Area 9152860160 bytes
Fixed Size 2234056 bytes
Variable Size 6945769784 bytes
Database Buffers 2181038080 bytes
Redo Buffers 23818240 bytes
Database mounted.
Database opened.

Make changes at Listener.ora,tnsnames.ora files on Second Node RAC – Node4

RACNode3> show parameter instance_name
instance_name string LDTTEST1
RACNode3> select count(*) from tab;
4865
RACNode3> show parameter cluster_database
cluster_database boolean TRUE

RACNode4> show parameter instance_name
instance_name string LDTTEST2
RACNode4> select count(*) from tab;
4865
RACNode4> show parameter cluster_database
cluster_database boolean TRUE

Lets make the database Cluster services aware.

[oracle@Node3 dbs]$ srvctl add database -d LDTEST -o /opt/app/oracle/product/11.2/db_1 -p /mnt/data/oradata/LDTEST/spfileLDTTEST.ora
[oracle@Node3 dbs]$ srvctl add instance -d LDTEST -i LDTTEST1 -n Node3
[oracle@Node3 dbs]$ srvctl add instance -d LDTEST -i LDTTEST2 -n Node4
[oracle@Node3 arch]$ /home/oracle/Scripts/crsstat.sh | grep LDTEST
ora.LDTEST.db OFFLINE OFFLINE

Finally  stop/start RAC Databases using srvctl commands

[oracle@Node3 dbs]$ srvctl start database -d LDTEST
[oracle@Node3 dbs]$ $HOME/Scripts/crsstat.sh | grep prod
ora.prod.db ONLINE ONLINE on Node3
[oracle@Node3 dbs]$ srvctl status database -d LDTEST
Instance LDTTEST1 is running on node Node3
Instance LDTTEST2 is running on node Node4

Have a look at alrtlog for any issues reported.

Replicating RAC database using RMAN at Remote Server

Posted by Sagar Patil

Here I am duplicating 11g RAC database from one RHEL Server to Another by old 10g method.
I could have used 11g “DUPLICATE TARGET DATABASE TO TARGET_DB FROM ACTIVE DATABASE” which doesn’t need previous rman backup at source. But it may not be a good option for large databases or at places with narrow network bandwidth.

Assumptions Made:

– RAC Clusterware and Database binaries are installed at Destination Nodes
– Clusterware services “crsctl check crs” reported active

PRIMARY site Tasks (Ora01a1,Ora01a2):

  • Create FULL RMAN Backup
  • Copy backup files from PRIMARY server to New server
  • Create pfile from spfile at source RAC
  • Copy init.ora from $Primary_Server:ORACLE_HOME/dbs to $New_Server:ORACLE_HOME/dbs
  • Copy $Primary_Server:ORACLE_HOME/dbs/password file to $New_Server:ORACLE_HOME/dbs

[oracle@Ora01a1 RAC1]$ scp Ora01a1BKUP.tgz oracle@Node1:/mnt/data
Warning: Permanently added (RSA) to the list of known hosts.
Ora01a1BKUP.tgz                                                          100%  274MB  11.4MB/s   00:24

SQL> show parameter pfile
NAME                                 TYPE        VALUE
———————————— ———– ——————————
spfile                               string      /mnt/data/oradata/primary/spfileRAC.ora

SQL> show parameter spfile
NAME                                 TYPE        VALUE
———————————— ———– ——————————
spfile                               string      /mnt/data/oradata/primary/spfileRAC.ora

SQL> create pfile=’/mnt/data/oradata/primary/init.ora’ from spfile;
File created

[oracle@Ora01a1 RAC]$ scp init.ora oracle@Node1:/mnt/data/rman_backups/bkup/init.ora 100% 1612     1.6KB/s   00:00
[oracle@Ora01a1 dbs]$ scp /mnt/data/oradata/primary/orapwRAC oracle@Node1:/mnt/data/rman_backups/bkup   orapwRAC 100% 1536     1.5KB/s   00:00

Destination Site Tasks (Node1,Node2)
Create required directories for bdump,adump as well as database mount volumes.

[oracle@Node1]$ grep /mnt initRAC.ora
*.control_files=’/mnt/data/oradata/primary/control01.ctl’,’/mnt/data/oradata/primary/control02.ctl’
*.db_recovery_file_dest=’/mnt/logs/oradata/primary/fast_recovery_area’
*.log_archive_dest_1=’LOCATION=/mnt/logs/oradata/primary/arch’

[oracle@Node1]$ mkdir -p /mnt/data/oradata/primary/
[oracle@Node1]$ mkdir -p /mnt/logs/oradata/primary/fast_recovery_area
[oracle@Node1]$ mkdir -p /mnt/logs/oradata/primary/arch

“opt” is a local volume for each instance so create directories on both RAC nodes
[oracle@Node1]$ grep /opt initRAC.ora
*.audit_file_dest=’/opt/app/oracle/admin/primary/adump’
*.diagnostic_dest=’/opt/app/oracle’

[oracle@Node1]$ mkdir -p /opt/app/oracle/admin/primary/adump
[oracle@Node1]$ mkdir -p /opt/app/oracle

[oracle@Node2]$ mkdir -p /opt/app/oracle/admin/primary/adump
[oracle@Node3]$ mkdir -p /opt/app/oracle

Under 11g background trace will be maintained at “$ORACLE_BASE/diag/rdbms”, if required create necessary directories there.

Modify init.ora file ($ORACLE_HOME/dbs/init.ora) and amend/change parameters. I had to comment out “remote_listener” parameter as the serversnames at destination are different.

Copy init.ora at both nodes “Node1,Node2″@$ORACLE_HOME/dbs

[oracle@Node1 dbs]$ cp initRAC.ora initRAC1.ora

[oracle@Node1 dbs]$ echo $ORACLE_SID
RAC1
SQL> startup nomount;
ORACLE instance started.
Total System Global Area 9152860160 bytes
Fixed Size                  2234056 bytes
Variable Size            6945769784 bytes
Database Buffers         2181038080 bytes
Redo Buffers               23818240 bytes

[oracle@Node1 dbs]$ rman target / nocatalog
connected to target database: RAC (not mounted)
using target database control file instead of recovery catalog
RMAN> restore controlfile from ‘/mnt/data/rman_backups/bkup/c-4020163152-20110405-01’;
allocated channel: ORA_DISK_1
channel ORA_DISK_1: SID=588 instance=RAC1 device type=DISK
channel ORA_DISK_1: restoring control file
channel ORA_DISK_1: restore complete, elapsed time: 00:00:03
output file name=/mnt/data/oradata/primary/control01.ctl
output file name=/mnt/data/oradata/primary/control02.ctl
.

………
Finished restore at 05-APR-11

Verify controlfiles are copied at right location

[oracle@Node2 RAC]$ pwd
/mnt/data/oradata/RAC

[oracle@Node2 RAC]$ ls -lrt
-rw-r—–  1 oracle oinstall 22986752 Apr  5 16:35 control01.ctl
-rw-r—–  1 oracle oinstall 22986752 Apr  5 16:35 control02.ctl

RMAN> alter database mount;
database mounted
RMAN> RESTORE DATABASE;
Starting restore at 05-APR-11
Starting implicit crosscheck backup at 05-APR-11
allocated channel: ORA_DISK_1
allocated channel: ORA_DISK_2
******* This returned errors
RMAN-00571: ===========================================================
RMAN-00569: =============== ERROR MESSAGE STACK FOLLOWS ===============
RMAN-00571: ===========================================================
RMAN-03002: failure of restore command at 04/05/2011 16:36:54
RMAN-06026: some targets not found – aborting restore
RMAN-06023: no backup or copy of datafile 3 found to restore

RMAN was not able to locate backup since backupset was not registered with rman inventory & copied at different location. Let’s catalog backup pieces that were shipped from Primary database.

I have multiple copies of backup files so I used
RMAN> CATALOG START WITH ‘/mnt/data/rman_backups/bkup/’ NOPROMPT;
List of Cataloged Files
=======================
File Name: /mnt/data/rman_backups/bkup/c-4020163152-20110405-04
File Name: /mnt/data/rman_backups/bkup/c-4020163152-20110405-05
File Name: /mnt/data/rman_backups/bkup/db_bk_ub8m91cg7_s3432_p1_t747680263.bkp
File Name: /mnt/data/rman_backups/bkup/db_bk_ub9m91cg8_s3433_p1_t747680264.bkp
File Name: /mnt/data/rman_backups/bkup/db_bk_ubam91cg9_s3434_p1_t747680265.bkp
File Name: /mnt/data/rman_backups/bkup/db_bk_ubcm91cgi_s3436_p1_t747680274.bkp
File Name: /mnt/data/rman_backups/bkup/db_bk_ubdm91cgi_s3437_p1_t747680274.bkp
File Name: /mnt/data/rman_backups/bkup/db_bk_ubbm91cgi_s3435_p1_t747680274.bkp
File Name: /mnt/data/rman_backups/bkup/db_bk_ubem91ck0_s3438_p1_t747680384.bkp
File Name: /mnt/data/rman_backups/bkup/db_bk_ubfm91ck0_s3439_p1_t747680384.bkp
File Name: /mnt/data/rman_backups/bkup/ctl_bk_ubhm91ck3_s3441_p1_t747680387.bkp

RMAN> RESTORE DATABASE;
channel ORA_DISK_1: starting datafile backup set restore
channel ORA_DISK_1: specifying datafile(s) to restore from backup set
channel ORA_DISK_1: restoring datafile 00001 to /mnt/data/oradata/primary/system01.dbf
channel ORA_DISK_1: restoring datafile 00005 to /mnt/data/oradata/primary/undotbs02.dbf
channel ORA_DISK_1: reading from backup piece /mnt/data/rman_backups/bkup/db_bk_ubdm91cgi_s3437_p1_t747680274.bkp
.
..
channel ORA_DISK_1: piece handle=/mnt/data/rman_backups/bkup/db_bk_ubdm91cgi_s3437_p1_t747680274.bkp tag=TAG20110405T165753
channel ORA_DISK_1: restored backup piece 1
channel ORA_DISK_1: restore complete, elapsed time: 00:01:26
channel ORA_DISK_2: piece handle=/mnt/data/rman_backups/bkup/db_bk_ubcm91cgi_s3436_p1_t747680274.bkp tag=TAG20110405T165753
channel ORA_DISK_2: restored backup piece 1
channel ORA_DISK_2: restore complete, elapsed time: 00:01:26
channel ORA_DISK_3: piece handle=/mnt/data/rman_backups/bkup/db_bk_ubbm91cgi_s3435_p1_t747680274.bkp tag=TAG20110405T165753
channel ORA_DISK_3: restored backup piece 1
channel ORA_DISK_3: restore complete, elapsed time: 00:01:56
Finished restore at 05-APR-11

RMAN> recover database;
channel ORA_DISK_1: starting archived log restore to default destination
channel ORA_DISK_1: restoring archived log
archived log thread=1 sequence=3289
channel ORA_DISK_1: reading from backup piece /mnt/data/rman_backups/bkup/db_bk_ubem91ck0_s3438_p1_t747680384.bkp
channel ORA_DISK_2: starting archived log restore to default destination
channel ORA_DISK_2: restoring archived log
archived log thread=2 sequence=3484
RMAN-00571: ===========================================================
RMAN-00569: =============== ERROR MESSAGE STACK FOLLOWS ===============
RMAN-00571: ===========================================================
RMAN-03002: failure of recover command at 04/05/2011 17:17:46
RMAN-06054: media recovery requesting unknown archived log for thread 1 with sequence 3290 and starting SCN of 246447604

RMAN> ALTER DATABASE OPEN RESETLOGS;
database opened

Shutdown and restart database RAC1

SQL> shutdown abort;
ORACLE instance shut down.

set sqlprompt ‘&_CONNECT_IDENTIFIER > ‘
RAC1> startup;
ORACLE instance started.
Total System Global Area 9152860160 bytes
Fixed Size                  2234056 bytes
Variable Size            6945769784 bytes
Database Buffers         2181038080 bytes
Redo Buffers               23818240 bytes
Database mounted.
Database opened.

RAC1> set linesize 200;
RAC1> set pagesize 20;
RAC1> select inst_id,substr(member,1,35) from gv$logfile;
INST_ID SUBSTR(MEMBER,1,35)
———- ——————————————————————————————————————————————–
1 /mnt/data/oradata/primary/redo02.log
1 /mnt/data/oradata/primary/redo01.log
1 /mnt/data/oradata/primary/redo03.log
1 /mnt/data/oradata/primary/redo04.log

I can see , INSTANCE 2 REDO log files are not listed so startup RAC2 instance at Node2

[oracle@Node2 dbs]$ echo $ORACLE_SID
RAC2
SQL> set sqlprompt ‘&_CONNECT_IDENTIFIER > ‘
RAC2> startup;
ORACLE instance started.
Total System Global Area 9152860160 bytes
Fixed Size                  2234056 bytes
Variable Size            6610225464 bytes
Database Buffers         2516582400 bytes
Redo Buffers               23818240 bytes
Database mounted.
Database opened.

I can now locate REDO files for Instance 1 as well as 2

select inst_id,substr(member,1,35) from gv$logfile;
INST_ID SUBSTR(MEMBER,1,35)
———- ——————————————————————————————————————————————–
2 /mnt/data/oradata/primary/redo02.log
2 /mnt/data/oradata/primary/redo01.log
2 /mnt/data/oradata/primary/redo03.log
2 /mnt/data/oradata/primary/redo04.log
1 /mnt/data/oradata/primary/redo02.log
1 /mnt/data/oradata/primary/redo01.log
1 /mnt/data/oradata/primary/redo03.log
1 /mnt/data/oradata/primary/redo04.log
8 rows selected.

I will carry log switchs to see ARCHIVE files create at Archive Destination “/mnt/logs/oradata/primary/arch”

RAC1 > alter system switch logfile;
System altered.
RAC1 > /
System altered.
RAC2 > alter system switch logfile;
System altered.
RAC2 > /
System altered.
[oracle@Node2 arch]$ pwd
/mnt/logs/oradata/primary/arch
[oracle@Node2 arch]$ ls -lrt
total 5348
-rw-r—–  1 oracle oinstall  777216 Apr  6 10:00 1_10_747681489.arc
-rw-r—–  1 oracle oinstall    4096 Apr  6 10:00 1_11_747681489.arc
-rw-r—–  1 oracle oinstall 4667392 Apr  6 10:00 2_11_747681489.arc
-rw-r—–  1 oracle oinstall   56832 Apr  6 10:01 2_12_747681489.arc

We have some background jobs in this database. I will set them to sleep at both databases for some time

RAC1 > alter system set job_queue_processes=0;
System altered.

RAC2 > alter system set job_queue_processes=0;
System altered.

See if there are any alrtlog errors reported at nodes node1/node2 before Registering  database with CRS

RAC1> create spfile from pfile;
File created.

[oracle@Node1 dbs]$ pwd
/opt/app/oracle/product/11.2/db_1/dbs
-rw-r—–  1 oracle oinstall     3584 Apr  6 10:20 spfileRAC1.ora

Move spfile at a shared clustered location accessible to both Nodes/Instances RAC1/RAC2.

cp spfileRAC1.ora /mnt/data/oradata/primary/spfileRAC.ora

[oracle@(RAC1 or RAC2 ) ]$ df -k
/dev/mapper/System-Opt 20314748  14636172   4630208  76% /opt   — Local Storage
NETAPP_Server:/vol/prod_data 52428800  33919456  18509344  65% /mnt/data — Clustered Storage

[oracle@RAC1 PROD]$ ls -l /mnt/data/oradata/primary/spfile*
-rw-r—– 1 oracle oinstall 7680 May 10 15:18 spfileRAC.ora

Link individual init files on nodes RAC1/RAC2 to spfile

[oracle@RAC1]$ cd $ORACLE_HOME/dbs

[oracle@RAC1 dbs]$ cat initRAC1.ora
SPFILE=’/mnt/data/oradata/primary/spfileRAC.ora’

[oracle@RAC2 dbs]$ cat initRAC2.ora
SPFILE=’/mnt/data/oradata/primary/spfileRAC.ora’

Registering  database with CRS

[oracle@Node1 dbs]$ srvctl add database -d RAC -o /opt/app/oracle/product/11.2/db_1 -p  /mnt/data/oradata/primary/spfileRAC.ora
[oracle@Node1 dbs]$ srvctl add instance -d RAC -i RAC1 -n Node1
[oracle@Node1 dbs]$ srvctl add instance -d RAC -i RAC2 -n Node2
[oracle@Node2 arch]$ crsstat.sh  | grep RAC
ora.RAC.db                                 OFFLINE    OFFLINE

Before using services, we must check the cluster configuration is correct

[oracle@Node1 dbs]$ srvctl config database -d RAC
Database unique name: RAC
Database name:
Oracle home: /opt/app/oracle/product/11.2/db_1
Oracle user: oracle
Spfile: /mnt/data/oradata/primary/spfileRAC.ora
Domain:
Start options: open
Stop options: immediate
Database role: PRIMARY
Management policy: AUTOMATIC
Server pools: RAC
Database instances: RAC1,RAC2
Disk Groups:
Mount point paths:
Services:
Type: RAC
Database is administrator managed

[oracle@Node1 dbs]$ srvctl start database -d RAC
PRCR-1079 : Failed to start resource ora.RAC.db
CRS-5017: The resource action “ora.RAC.db start” encountered the following error:
ORA-29760: instance_number parameter not specified

Solution of the Problem
srvctl is case sensitive. So we need to ensure that instance and database definitions set in spfile/pfile are same case as those in the OCR and as are used in the srvctl commands. I made a mistake here and added “GDPROD1/2” in lowercase “RAC1/RAC2” while creating services.
Before going into solution be sure that ORACLE_SID reflects correct case so that instance can be accessed using SQL*Plus

I will have to remove services created earlier and add them with “UPPERCASE” instance name

[oracle@Node1 dbs]$ srvctl remove database -d RAC

Remove the database RAC? (y/[n]) y
[oracle@Node1 dbs]$ srvctl remove instance -d RAC -i RAC1
PRCD-1120 : The resource for database RAC could not be found.
PRCR-1001 : Resource ora.RAC.db does not exist
[oracle@Node1 dbs]$ srvctl remove instance -d RAC -i RAC2
PRCD-1120 : The resource for database RAC could not be found.

[oracle@Node1 dbs]$ srvctl add database -d RAC -o /opt/app/oracle/product/11.2/db_1 -p /mnt/data/oradata/primary/spfileRAC.ora
[oracle@Node1 dbs]$ srvctl add instance -d RAC -i RAC1 -n Node1
[oracle@Node1 dbs]$ srvctl add instance -d RAC -i RAC2 -n Node2
[oracle@Node2 arch]$ crsstat.sh  | grep RAC
ora.RAC.db                                 OFFLINE OFFLINE

Moment of TRUTH , start the Database

[oracle@Node1 dbs]$ srvctl start database -d RAC
[oracle@Node1 dbs]$ crsstat.sh  | grep RAC
ora.RAC.db                                 ONLINE ONLINE on Node1

[oracle@Node1 ~]$ export ORACLE_SID=RAC1
SQL> set sqlprompt ‘&_CONNECT_IDENTIFIER > ‘
RAC1 > archive log list;
Database log mode              Archive Mode
Automatic archival             Enabled
Archive destination            /mnt/logs/oradata/primary/arch
Oldest online log sequence     18
Next log sequence to archive   19
Current log sequence           19

SQL>  set sqlprompt ‘&_CONNECT_IDENTIFIER > ‘
RAC2 > archive log list;
Database log mode              Archive Mode
Automatic archival             Enabled
Archive destination            /mnt/logs/oradata/primary/arch
Oldest online log sequence     20
Next log sequence to archive   21
Current log sequence           21

Finally have a look at alrtlog for any issues reported

To test session failover , I will create SQLPLUS connection and see if  it gets migrated to other node when instance goes down.

SQL> select machine from v$session where rownum <5;
MACHINE
—————————————————————-
Node1
Node1
Node1
Node1

Node1 RAC1> shutdown abort;
ORACLE instance shut down.

SQL> select machine from v$session where rownum <5;
MACHINE
—————————————————————-
Node2
Node2
Node2
Node2

Cleaning up a machine with previous Oracle 11g Clusterware/RAC install

Posted by Sagar Patil

Here I will be deleting everything from a 2 node 11g RAC cluster

  1. Use “crs_stop -all” to stop all services on RAC nodes
  2. Use DBCA GUI to delete all RAC databases from nodes
  3. Use netca to delete LISTENER config
  4. Deinstall Grid Infrastructure from Server
  5. Deinstall Oracle database software from Server

Steps 1-3 are self-explanatory

4.Deinstall Grid Infrastructure from Server :

[oracle@RAC2 backup]$ $GRID_HOME/deinstall/deinstall

Checking for required files and bootstrapping …
Please wait …
Location of logs /opt/app/oracle/oraInventory/logs/
############ ORACLE DEINSTALL & DECONFIG TOOL START ############

######################### CHECK OPERATION START #########################
Install check configuration START
Checking for existence of the Oracle home location /opt/app/grid/product/11.2/grid_1
Oracle Home type selected for de-install is: CRS
Oracle Base selected for de-install is: /opt/app/oracle
Checking for existence of central inventory location /opt/app/oracle/oraInventory
Checking for existence of the Oracle Grid Infrastructure home /opt/app/grid/product/11.2/grid_1
The following nodes are part of this cluster: RAC1,RAC2
Install check configuration END
Skipping Windows and .NET products configuration check
Checking Windows and .NET products configuration END
Traces log file: /opt/app/oracle/oraInventory/logs//crsdc.log
Network Configuration check config START
Network de-configuration trace file location: /opt/app/oracle/oraInventory/logs/netdc_check2011-03-31_10-14-05-AM.log
Network Configuration check config END
Asm Check Configuration START
ASM de-configuration trace file location: /opt/app/oracle/oraInventory/logs/asmcadc_check2011-03-31_10-14-06-AM.log
ASM configuration was not detected in this Oracle home. Was ASM configured in this Oracle home (y|n) [n]:
######################### CHECK OPERATION END #########################

####################### CHECK OPERATION SUMMARY #######################
Oracle Grid Infrastructure Home is: /opt/app/grid/product/11.2/grid_1
The cluster node(s) on which the Oracle home de-installation will be performed are:RAC1,RAC2
Oracle Home selected for de-install is: /opt/app/grid/product/11.2/grid_1
Inventory Location where the Oracle home registered is: /opt/app/oracle/oraInventory
Skipping Windows and .NET products configuration check
ASM was not detected in the Oracle Home
Do you want to continue (y – yes, n – no)? [n]: y
A log of this session will be written to: ‘/opt/app/oracle/oraInventory/logs/deinstall_deconfig2011-03-31_10-14-02-AM.out’
Any error messages from this session will be written to: ‘/opt/app/oracle/oraInventory/logs/deinstall_deconfig2011-03-31_10-14-02-AM.err’

######################## CLEAN OPERATION START ########################
ASM de-configuration trace file location: /opt/app/oracle/oraInventory/logs/asmcadc_clean2011-03-31_10-14-44-AM.log
ASM Clean Configuration END
Network Configuration clean config START
Network de-configuration trace file location: /opt/app/oracle/oraInventory/logs/netdc_clean2011-03-31_10-14-44-AM.log
De-configuring Naming Methods configuration file on all nodes…
Naming Methods configuration file de-configured successfully.
De-configuring Local Net Service Names configuration file on all nodes…
Local Net Service Names configuration file de-configured successfully.
De-configuring Directory Usage configuration file on all nodes…
Directory Usage configuration file de-configured successfully.
De-configuring backup files on all nodes…
Backup files de-configured successfully.
The network configuration has been cleaned up successfully.
Network Configuration clean config END
—————————————->
The deconfig command below can be executed in parallel on all the remote nodes. Execute the command on  the local node
Run the following command as the root user or the administrator on node “RAC1″.
/tmp/deinstall2011-03-31_10-13-56AM/perl/bin/perl -I/tmp/deinstall2011-03-31_10-13-56AM/perl/lib -I/tmp/deinstall2011-mp/deinstall2011-03-31_10-13-56AM/response/deinstall_Ora11g_gridinfrahome1.rsp”
Run the following command as the root user or the administrator on node “RAC2″.
/tmp/deinstall2011-03-31_10-13-56AM/perl/bin/perl -I/tmp/deinstall2011-03-31_10-13-56AM/perl/lib -I/tmp/deinstall2011-mp/deinstall2011-03-31_10-13-56AM/response/deinstall_Ora11g_gridinfrahome1.rsp” -lastnode
Press Enter after you finish running the above commands
<—————————————-

Let’s run these comamnds on Nodes

[oracle@RAC1 app]$ /tmp/deinstall2011-03-31_10-13-56AM/perl/bin/perl -I/tmp/deinstall2011-03-31_10-13-56AM/perl/lib -I/tmp/deinstall2011mp/deinstall2011-03-31_10-13-56AM/response/deinstall_Ora11g_gridinfrahome1.rsp
[oracle@RAC1 app]$ su –
Password:
[root@RAC1 ~]# /tmp/deinstall2011-03-31_10-13-56AM/perl/bin/perl -I/tmp/deinstall2011-03-31_10-13-56AM/perl/lib -I/tmp/deinstall2011-mp/deinstall2011-03-31_10-13-56AM/response/deinstall_Ora11g_gridinfrahome1.rsp”
>
[root@RAC1 ~]# /tmp/deinstall2011-03-31_10-22-37AM/perl/bin/perl -I/tmp/deinstall2011-03-31_10-22-37AM/perl/lib -I/tmp/deinstall2011-03-31_10-22-37AM/crs/install /tmp/deinstall2011-03-31_10-22-37AM/crs/install/rootcrs.pl -force  -deconfig -paramfile “/tmp/deinstall2011-03-31_10-22-37AM/response/deinstall_Ora11g_gridinfrahome1.rsp”
Using configuration parameter file: /tmp/deinstall2011-03-31_10-22-37AM/response/deinstall_Ora11g_gridinfrahome1.rsp
Network exists: 1/192.168.31.0/255.255.255.0/bond0, type static
VIP exists: /RAC1-vip/192.168.31.21/192.168.31.0/255.255.255.0/bond0, hosting node RAC1
VIP exists: /RAC2-vip/192.168.31.23/192.168.31.0/255.255.255.0/bond0, hosting node RAC2
GSD exists
ONS exists: Local port 6100, remote port 6200, EM port 2016
ACFS-9200: Supported
CRS-2791: Starting shutdown of Oracle High Availability Services-managed resources on ‘RAC1’
CRS-2673: Attempting to stop ‘ora.crsd’ on ‘RAC1’
CRS-2677: Stop of ‘ora.crsd’ on ‘RAC1’ succeeded
CRS-2673: Attempting to stop ‘ora.mdnsd’ on ‘RAC1’
CRS-2673: Attempting to stop ‘ora.crf’ on ‘RAC1’
CRS-2673: Attempting to stop ‘ora.ctssd’ on ‘RAC1’
CRS-2673: Attempting to stop ‘ora.evmd’ on ‘RAC1’
CRS-2673: Attempting to stop ‘ora.cluster_interconnect.haip’ on ‘RAC1’
CRS-2677: Stop of ‘ora.crf’ on ‘RAC1’ succeeded
CRS-2677: Stop of ‘ora.mdnsd’ on ‘RAC1’ succeeded
CRS-2677: Stop of ‘ora.cluster_interconnect.haip’ on ‘RAC1’ succeeded
CRS-2677: Stop of ‘ora.evmd’ on ‘RAC1’ succeeded
CRS-2677: Stop of ‘ora.ctssd’ on ‘RAC1’ succeeded
CRS-2673: Attempting to stop ‘ora.cssd’ on ‘RAC1’
CRS-2677: Stop of ‘ora.cssd’ on ‘RAC1’ succeeded
CRS-2673: Attempting to stop ‘ora.gipcd’ on ‘RAC1’
CRS-2673: Attempting to stop ‘ora.diskmon’ on ‘RAC1’
CRS-2677: Stop of ‘ora.diskmon’ on ‘RAC1’ succeeded
CRS-2677: Stop of ‘ora.gipcd’ on ‘RAC1’ succeeded
CRS-2673: Attempting to stop ‘ora.gpnpd’ on ‘RAC1’
CRS-2677: Stop of ‘ora.gpnpd’ on ‘RAC1’ succeeded
CRS-2793: Shutdown of Oracle High Availability Services-managed resources on ‘RAC1’ has completed
CRS-4133: Oracle High Availability Services has been stopped.
Successfully deconfigured Oracle clusterware stack on this node
************** **************

… continue as below once above commands compiled successfully

Removing Windows and .NET products configuration END
Oracle Universal Installer clean START
Detach Oracle home ‘/opt/app/grid/product/11.2/grid_1’ from the central inventory on the local node : Done
Failed to delete the directory ‘/opt/app/grid/product/11.2/grid_1’. The directory is in use.
Delete directory ‘/opt/app/grid/product/11.2/grid_1’ on the local node : Failed <<<<
The Oracle Base directory ‘/opt/app/oracle’ will not be removed on local node. The directory is in use by Oracle Home ‘/opt/app/oracle/product/11.2/db_1’.
The Oracle Base directory ‘/opt/app/oracle’ will not be removed on local node. The directory is in use by central inventory.
Detach Oracle home ‘/opt/app/grid/product/11.2/grid_1’ from the central inventory on the remote nodes ‘RAC1’ : Done
Delete directory ‘/opt/app/grid/product/11.2/grid_1’ on the remote nodes ‘RAC1’ : Done
The Oracle Base directory ‘/opt/app/oracle’ will not be removed on node ‘RAC1’. The directory is in use by Oracle Home ‘/opt/app/oracle/product/11.2/db_1’.
The Oracle Base directory ‘/opt/app/oracle’ will not be removed on node ‘RAC1’. The directory is in use by central inventory.
Oracle Universal Installer cleanup was successful.
Oracle Universal Installer clean END
Oracle install clean START
Clean install operation removing temporary directory ‘/tmp/deinstall2011-03-31_10-22-37AM’ on node ‘RAC2’
Clean install operation removing temporary directory ‘/tmp/deinstall2011-03-31_10-22-37AM’ on node ‘RAC1’
Oracle install clean END
######################### CLEAN OPERATION END #########################

####################### CLEAN OPERATION SUMMARY #######################
Oracle Clusterware is stopped and successfully de-configured on node “RAC2”
Oracle Clusterware is stopped and successfully de-configured on node “RAC1”
Oracle Clusterware is stopped and de-configured successfully.
Skipping Windows and .NET products configuration clean
Successfully detached Oracle home ‘/opt/app/grid/product/11.2/grid_1’ from the central inventory on the local node.
Failed to delete directory ‘/opt/app/grid/product/11.2/grid_1’ on the local node.
Successfully detached Oracle home ‘/opt/app/grid/product/11.2/grid_1’ from the central inventory on the remote nodes ‘RAC1’.
Successfully deleted directory ‘/opt/app/grid/product/11.2/grid_1’ on the remote nodes ‘RAC1’.
Oracle Universal Installer cleanup was successful.
Oracle deinstall tool successfully cleaned up temporary directories.
#######################################################################
############# ORACLE DEINSTALL & DECONFIG TOOL END #############

[oracle@RAC2 11.2]$ cd $GRID_HOME
[oracle@RAC2 grid_1]$ pwd
/opt/app/grid/product/11.2/grid_1
[oracle@RAC2 grid_1]$ ls -lrt
total 0

Oracle clusterware was clearly removed from $CRS_HOME /$GRID_HOME. Lets proceed with next step.

5. Deinstall Oracle database software from Server

Note: Always use the Oracle Universal Installer to remove Oracle software. Do not delete any Oracle home directories without first using the Installer to remove the software.

[oracle@RAC2 11.2]$ pwd
/opt/app/oracle/product/11.2
oracle@RAC2 11.2]$ du db_1/
4095784 db_1/

Start the Installer as follows:
[oracle@RAC2 11.2]$ $ORACLE_HOME/oui/bin/runInstaller
Starting Oracle Universal Installer…

Checking swap space: must be greater than 500 MB.   Actual 2047 MB    Passed
Checking monitor: must be configured to display at least 256 colors.    Actual 16777216    Passed
Preparing to launch Oracle Universal Installer from /tmp/OraInstall2011-03-31_10-37-33AM. Please wait …[oracle@RAC2 11.2]$ Oracle Universal Installer, Version 11.2.0.2.0 Production
Copyright (C) 1999, 2010, Oracle. All rights reserved.

####################### CHECK OPERATION SUMMARY #######################
Oracle Grid Infrastructure Home is:
The cluster node(s) on which the Oracle home de-installation will be performed are:RAC1,RAC2
Oracle Home selected for de-install is: /opt/app/oracle/product/11.2/db_1
Inventory Location where the Oracle home registered is: /opt/app/oracle/oraInventory
Skipping Windows and .NET products configuration check
Following RAC listener(s) will be de-configured: LISTENER
No Enterprise Manager configuration to be updated for any database(s)
No Enterprise Manager ASM targets to update
No Enterprise Manager listener targets to migrate
Checking the config status for CCR
RAC1 : Oracle Home exists with CCR directory, but CCR is not configured
RAC2 : Oracle Home exists with CCR directory, but CCR is not configured
CCR check is finished
Do you want to continue (y – yes, n – no)? [n]:

……………………………………….  You will see lots of messages

####################### CLEAN OPERATION SUMMARY #######################
Following RAC listener(s) were de-configured successfully: LISTENER
Cleaning the config for CCR
As CCR is not configured, so skipping the cleaning of CCR configuration
CCR clean is finished
Skipping Windows and .NET products configuration clean
Successfully detached Oracle home ‘/opt/app/oracle/product/11.2/db_1’ from the central inventory on the local node.
Successfully deleted directory ‘/opt/app/oracle/product/11.2/db_1’ on the local node.
Successfully detached Oracle home ‘/opt/app/oracle/product/11.2/db_1’ from the central inventory on the remote nodes ‘RAC2’.
Successfully deleted directory ‘/opt/app/oracle/product/11.2/db_1’ on the remote nodes ‘RAC2’.
Oracle Universal Installer cleanup completed with errors.

Oracle deinstall tool successfully cleaned up temporary directories.
#######################################################################
############# ORACLE DEINSTALL & DECONFIG TOOL END #############

Let’s go to $ORACLE_HOME and see if any executables are remaining?

[oracle@RAC1 app]$ cd $ORACLE_HOME
-bash: cd: /opt/app/oracle/product/11.2/db_1: No such file or directory
[oracle@RAC2 product]$ pwd
/opt/app/oracle/product
[oracle@RAC2 product]$ du 11.2/
4       11.2/
(clearly no files available here)

ASM ftp/http Access

Posted by Sagar Patil

XDB enable use of FTP and HTML protocols to access and manage files located on ASM disksgroups. Files can be easily browse or moved in/out from ASM this way.

To set up the FTP access, We must first set up the Oracle XML DB access to the ASM folders. We can do this by executing the catxdbdbca.sql script, found in the $ORACLE_HOME/rdbms/admin directory. The script takes two parameters: the port numbers for the FTP and HTTP services, respectively. So I run the script as follows:

Sqlplus>connect sys/oracle @catxdbdbca 7787 8080

Running the script enables an FTP service listening on port 7787 and an HTTP service on port 8080. If you look at your listener status it should display the 2 new ports.

LSNRCTL> status
Connecting to (DESCRIPTION=(ADDRESS=(PROTOCOL=TCP)(HOST=localhost)(PORT=1521)))
STATUS of the LISTENER
————————
Alias listener
Version TNSLSNR for Linux: Version 10.2.0.1.0 – Production
Start Date 05-AUG-2009 17:44:48
Uptime 140 days 21 hr. 2 min. 48 sec
Trace Level off
Security ON: Local OS Authentication
SNMP OFF
Listener Parameter File /u01/app/oracle/product/10.2.0/db_1/network/admin/listener.ora
Listener Log File /u01/app/oracle/product/10.2.0/db_1/network/log/listener.log
Listening Endpoints Summary…
(DESCRIPTION=(ADDRESS=(PROTOCOL=tcp)(HOST=localhost)(PORT=1521)))
(DESCRIPTION=(ADDRESS=(PROTOCOL=ipc)(KEY=EXTPROC)))
(DESCRIPTION=(ADDRESS=(PROTOCOL=tcp)(HOST=localhost)(PORT=7787))(Presentation=FTP)(Session=RAW))
(DESCRIPTION=(ADDRESS=(PROTOCOL=tcp)(HOST=localhost)(PORT=8080))(Presentation=HTTP)(Session=RAW))

Use FTP to access ASM files : We can access the ASM folders from an external source, using a regular FTP client like filezilla.

ftp> open localhost 7787
Connected to localhost
Unauthorised use of this FTP server is prohibited and may be subject to civil and criminal prosecution.
220 wygtstorlocalhost FTP Server (Oracle XML DB/Oracle Database) ready.
530 Please login with USER and PASS.
KERBEROS_V4 rejected as an authentication type
Name (localhost:oracle): system
331 pass required for SYSTEM
Password:
230 SYSTEM logged in
Remote system type is Unix.
ftp> cd /sys/asm : ASM volumes stored here
250 CWD Command successful
ftp> ls
200 PORT Command successful
150 ASCII Data Connection
DATA
BACKUP
ftp: 21 bytes received in 0.48Seconds 0.04Kbytes/sec.

Use HTTP to access ASM files : Let’s use a browser to access asm files

My servername is localhost so I have to use URL http://localhost:8080. I entered oracle system user and password at credentials. The next screen shows the list of directories

Remove Failed Clusterware

Posted by Sagar Patil

If you have already uninstalled Oracle Clusterware using the Oracle Universal Installer – Please download attached file cleanup.zip that contains a copy of the logpartformat.exe and the guioracleobjmanage.exe (plus necessary dll).

In case you have Clusterware installed – (You need to carry these steps only from one node)

Remove the partitions that have been initialized for ocrcfg and votedsk

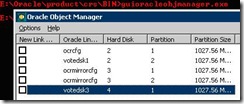
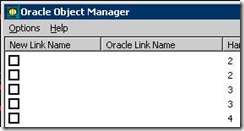
1. You can view these using the Oracle provided tool: guioracleobjmanager.exe
Invoke the Oracle tool GuiOracleObjManager.exe to see the link names that have been assigned to your partitions:

clip_image002

2. Use Services on Windows to stop the following services on each cluster node and set them to Manual. Please stop all oracle services.

clip_image004

clip_image006

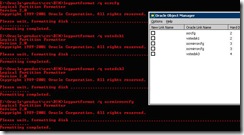
3. Remove the formatting on these partitions using the Oracle provided tool: logpartformat.exe. Invoke the Oracle tool logpatformat to reinitialize the headers of the disks you have specified for use as votedsk1 and ocrcfg

For RAW partitions:

run logpartformat /q <link name as shown to you in guioracleobjmanager tool
For example “logpartformat /q ocrcfg” repeat this step for all link names listed in guioracleobjmanager

clip_image008

For OCFS:

run logpartformat /q <DRIVELETTER>
For example, if the drive letter for your OCFS partition is ‘ P ‘

logpartformat /q P:

Certain times Logpartformat can fail. For example:

$CRS_HOME/BIN>logpartformat /q \\.\votedsk1
Logical Partition Formatter
Version 2.0
Copyright 1989-2001 Oracle Corporation. All rights reserved.
Unable to validate logical partition for symbolic link votedsk1

This is typically an access problem but cleaning up the disks can be problematic in such a case. Physically removing the disks and creating new ones with different sizes has been known to help in some cases.

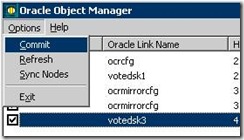
4. Remove the assigned link names using the GUIOracleobjmanager.exe
– Go back to the guioracleobjmanager tool and remove all link names:
– place a check mark in the box preceding each link name / physical partition listed
– then go to the Options menu and click ‘commit
– the link names should now be removed

clip_image010 clip_image012

5. If possible remove and recreate your logical drives on top of extended partitions at this time from Windows Disk Management.

6. Use the Oracle Universal Installer to remove the empty CRS home (cleans up the inventory file)

7. Remove Oracle binaries using Windows explorer, both the CRS home and the files located in:

8. Using Windows explorer, remove the following driver files from: %systemroot%\windows\system32\drivers:
* ocfs.sys
* orafencedrv.sys
* orafenceservice.sys

9. Reboot all servers in your RAC configuration

You can also look at metalink note 341214.1

11g RAC : Download & Install cluvfy(Cluster verify) Utility

Posted by Sagar Patil

How do I install CVU from OTN? Download From Here

1. Create a CV home( say /home/username/mycvhome ) directory. It should have at least 35M of free disk space.
2. cd /home/username/mycvhome
3. copy the cvupack_<platform>.zip file to /home/username/mycvhome
4. unzip the file: unzip cvupack<platform>.zip
5. (Optional) Set the environmental variable CV_DESTLOC. This should point to a writable area on *all* nodes. When invoked, the tool will attempt to copy the necessary bits as required to this location. Make sure the location exists on all nodes and it has write permission for CVU user. It is strongly recommended that you should set this variable. If this variable has not been set, CVU will use “/tmp” as the default. “setenv CV_DESTLOC /tmp/cvu_temp”

How do I know about cluvfy commands?
-type ‘cluvfy comp -list’

how to check the entire Oracle Clusterware stack
– cluvfy stage -post crsinst

How do I check the Oracle Clusterware stack and other sub-components of it?
– Use the ‘comp ocr’ command to check the integrity of OCR. Similarly, you can use ‘comp crs’ and ‘comp clumgr’ commands to check integrity of Oracle Clustereare and clustermanager sub-components.

How do I get detail output of a check?
– Cluvfy supports a verbose mode. By default, cluvfy reports in non-verbose mode. To get detailed output of a check, use the flag ‘-verbose’ in the command line.

How do I check network or node connectivity related issues?
-Use commands like ‘nodereach’ or ‘nodecon’ for this purpose.For syntax, type comp -help command on the command prompt.
If the ‘comp nodecon’ command is invoked without -i, cluvfy will attempt to discover all the available interfaces and the corresponding IP address & subnet. Then cluvfy will try to verify the node connectivity per subnet. You can run this command in verbose mode

10g RAC Install under RHEL/OEL 4.5

Posted by Sagar Patil

1.Objectives

5 Installation
5.1 CRS install
2 System Configuration 5.2 ASM Install
2.1 Machine Configuration 5.3 Install Database Software
2.2 External/Shared Storage 5.4 create RAC Database
2.3 Kernel Parameters 6 Scripts and profile files
5.4 .bash_profile rac01
3 Oracle Software Configuration 5.5 .bash_profile rac02
3.1 Directory Structure
3.2 Database Layout
3.3 Redo Logs 6 RAC Infrastructure Testing
3.4 Controlfiles 6.1 RAC Voting Disk Test
6.2 RAC Cluster Registry Test
4 Oracle Pre-Installation tasks 6.3 RAC ASM Tests
4.1 Installing Redhat 6.4 RAC Interconnect Test
4.2 Network Configuration 6.5 Loss of Oracle Config File
4.3 Copy Oracle 10.2.0.1 software onto server
4.4 Check installed packages Appendix
4.5 validate script 1. OCR/Voting disk volumes INAccessible by rac02 87
4.6 Download ASM packages 2. RAC cluster went down On PUBLIC network test. 88
4.7 Download OCFS packages
4.8 Creating Required Operating System Groups and Users.
4.9 Oracle required directory creation
4.10 Verifying That the User nobody Exists
4.11 Configuring SSH on Cluster Member Nodes For oracle
4.12 Configuring SSH on Cluster Member Nodes for root.
4.13 VNC setup
4.14 Kernel parameters
4.15 Verifying Hangcheck-timer Module on Kernel 2.6
4.16 Oracle user limits
4.17 Installing the cvuqdisk Packeage for linux.
4.18 Disk Partitioning
4.19 Checking the Network Setup with CVU
4.20 Checking the Hardware and Operating System Setup with CVU
4.21 Checking the Operating System Requirements with CVU.
4.22 Verifying Shared Storage
4.23 Verifying the Clusterware Requirements with CVU
4.24 ASM package install
4.25 OCFS package install
4.26 disable SELinux
4.27 OCFS2 Configuration
4.28 OCFS2 File system format
4.29 OCFS2 File system mount

Read more…

ADD/REMOVE/REPLACE/MOVE Oracle Cluster Registry (OCR) and Voting Disk

Posted by Sagar Patil

Note: You must be logged in as the root user, because root owns the OCR files.  Make sure there is a recent copy of the OCR file before making any changes: ocrconfig ­showbackup

If there is not a recent backup copy of the OCR file, an export can be taken for the current OCR file.

Use the following command to generate an export of the online OCR file:
ocrconfig ­export <OCR export_filename> -s online
If you should need to recover using this file, the fol owing command can be used:
ocrconfig import <OCR export_filename>

1. To add an OCR device:
To add an OCR device, provide the ful path including file name.

ocrconfig -replace ocr <filename>
To add an OCR mirror device, provide the ful path including file name.

ocrconfig -replace ocrmirror <filename>
2. To remove an OCR device:
To remove an OCR device:

ocrconfig -replace ocr
To remove an OCR mirror device

ocrconfig -replace ocrmirror
3. To replace or move the location of an OCR device:
To replace the OCR device with <filename>, provide the ful path including file name.

ocrconfig -replace ocr <filename>
To replace the OCR mirror device with <filename>, provide the ful path including file name.

ocrconfig -replace ocrmirror <filename>

Example moving OCR file from OCFS to raw devices
The OCR disk must be owned by root, must be in the oinstal group, and must have permissions set to 640.
In this example the OCR files are located in the ocfs2 file system:
/ocfs2/ocr1
/ocfs2/ocr2

Create raw device files of at least 100 MB. In this example the new OCR file wil be on the fol owing devices:
/dev/raw/raw1
/dev/raw/raw2
Once the raw devices are created, use the dd command to zero out the device and make sure no data is written
to the raw devices:
dd if=/dev/zero of=/dev/raw/raw1
dd if=/dev/zero of=/dev/raw/raw2

Note: Use UNIX man pages for additional information on the dd command.Now you are ready to move/replace the OCR file to the new storage location.

Move/Replace the OCR device
ocrconfig -replace ocr /dev/raw/raw1
Add /dev/raw/raw2 as OCR mirror device

ocrconfig -replace ocr /dev/raw/raw2
Example of adding an OCR device file
If you have upgraded your environment from a previous version, where you only had one OCR device file, you can
use the fol owing step to add an additional OCR file.
In this example a second OCR device file is added:
Add /dev/raw/raw2 as OCR mirror device

ocrconfig -replace ocr /dev/raw/raw2
ADD/DELETE/MOVE Voting Disk
Note: crsctl votedisk commands must be run as root
Note: Only use the -force flag when CRS is down
Shutdown the Oracle Clusterware (crsctl stop crs as root) on al nodes before making any modification to the
voting disk. Determine the current voting disk location using:
crsctl query css votedisk
Take a backup of al voting disk:

dd if=voting_disk_name of=backup_file_name
Note: Use UNIX man pages for additional information on the dd command.  The following can be used to restore the voting disk from the backup file created.

dd if=backup_file_name of=voting_disk_name
1. To add a Voting Disk, provide the full path including file name.:

crsctl add css votedisk <RAW_LOCATION> -force
2. To delete a Voting Disk, provide the full path including file name.:

crsctl delete css votedisk <RAW_LOCATION> -force
3. To move a Voting Disk, provide the full path including file name.:

crsctl delete css votedisk <OLD_LOCATION> ­force
crsctl add css votedisk <NEW_LOCATION> ­force
After modifying the voting disk, start the Oracle Clusterware stack on al nodes

crsctl start crs
Verify the voting disk location using

crsctl query css votedisk

1> Example : Moving Voting Disk from OCFS to raw devices. The voting disk is a partition that Oracle Clusterware uses to verify cluster node membership and status.
The voting disk must be owned by the oracle user, must be in the dba group, and must have permissions set to 644. Provide at least 20 MB disk space for the voting disk.
In this example the Voting Disks are located in the ocfs2 file system:
/ocfs2/voting1
/ocfs2/voting2
/ocfs2/voting3
Create raw device files of at least 20 MB. In this example the new voting disks wil be on the fol owing devices:
/dev/raw/raw3
/dev/raw/raw4
/dev/raw/raw5

Once the raw devices are created, use the dd command to zero out the device and make sure no data is written to the raw devices:
dd if=/dev/zero of=/dev/raw/raw3
dd if=/dev/zero of=/dev/raw/raw4
dd if=/dev/zero of=/dev/raw/raw5

Now you are ready to move/replace the voting disks to the new storage location.

To move a Voting Disk to new storage location:
crsctl delete css votedisk /ocfs2/voting1 ­force
crsctl add css votedisk /dev/raw/raw3 ­force
crsctl delete css votedisk /ocfs2/voting2 ­force
crsctl add css votedisk /dev/raw/raw4 ­force
crsctl delete css votedisk /ocfs2/voting3 ­force
crsctl add css votedisk /dev/raw/raw5 ­force

2> Example of adding Voting Disks
If you have upgraded your environment from a previous version, where you only had one voting disk, you can use
the fol owing steps to add additional voting disk.
In this example 2 additional Voting Disks are added:

crsctl add css votedisk /dev/raw/raw4 ­force
crsctl add css votedisk /dev/raw/raw5 ­force
After modifying the voting disk, start the Oracle Clusterware stack on al nodes

crsctl start crs
Verify the voting disk location using
crsctl query css votedisk

References
Note 390880.1 – OCR Corruption after Adding/Removing voting disk to a cluster when CRS stack is running

RAC Build on Solaris: Fifth Phase

Posted by Sagar Patil

Step by Step instructions on how to remove temp nodes from RAC cluster. Step by step instruction on how to verify removal of temp nodes.

REMOVAL OF CLUSTERING AFTER FAILOVER

1.shutdown the instances prod1,prod2 and then do the following.

2.Remove all the devdb entries for devdb or tempracsrv3,tempracsrv4 in tnsnames.ora

In both the servers—i.e. prodracsrv1,prodracsrv2.

3.Remove the following entries from init.ora in prodracsrv1,prodracsrv2

*.log_archive_config=’dg_config=

(PROD,DEVDB)’

*.log_archive_dest_2=’service=DEVDB

valid_for=(online_logfiles,primary_role)

db_unique_name=DEVDB’

*.standby_file_management=auto

*.fal_server=’DEVDB’

*.fal_client=’PROD’

*.service_names=’PROD’

4.After this Your PROD Database is Ready after failover .

RAC Build on Solaris : Fourth Phase

Posted by Sagar Patil

Step by Step instructions on how to fail RAC databases over from temp nodes to prod nodes. Includes step by step instructions on how to verify the failover from temp nodes to prod nodes. Step by Step instructions on how to test RAC database connectivity after failover.

FAILOVER

Performing a failover in a Data Guard configuration converts the standby database into the production database. The following sections describe this

Manual Failover

Manual failover is performed by the administrator directly through the Enterprise Manager graphical user interface, or the Data Guard broker command-line interface (DGMGRL), or by issuing SQL*Plus statements. The sections below describe the relevant SQL*Plus commands.

Simulation of Failover :-

Shutdown both the instances devdb1 ,devdb2(tempracsrv3,tempracsrv4) by connecting / as sysdba from command line And issuing the following command

SQL>shutdown abort..

Manual Failover to a Physical Standby Database(in PROD_PRODRACSRV1)

Use the following commands to perform a manual failover of a physical standby Database:

1. Initiate the failover by issuing the following on the target standby database:

SQL> ALTER DATABASE RECOVER MANAGED STANDBY DATABASE FINISH FORCE;

Note: Include the FORCE keyword to ensure that the RFS processes on the standby database will fail over without waiting for the network Connections to time out through normal TCP timeout processing before Shutting down.

2. Convert the physical standby database to the production role:

ALTER DATABASE COMMIT TO SWITCHOVER TO PRIMARY;

3. If the standby database was never opened read-only since the last time it was Started, then open the new production database by issuing the following Statement:

ALTER DATABASE OPEN;

If the physical standby database has been opened in read-only mode since the

last time it was started, shut down the target standby database and restart it:

SQL> SHUTDOWN IMMEDIATE;

SQL> STARTUP;

Note: In rare circumstances, administrators may wish to avoid waiting for the standby database to complete applying redo in the current standby redo log file before performing the failover. (note: use of Data Guard real-time apply will avoid this delay by keeping apply up to date on the standby database). If so desired, administrators may issue the ALTER DATABASE ACTIVATE STANDBY DATABASE statement to perform an immediate failover.

This statement converts the standby database to the production database, creates a new resetlogs branch, and opens the database. However, because this statement will cause any un-applied redo in the standby redo log to be lost, Oracle recommends you only use the failover procedure described in the above steps to perform a failover.

RAC Build on Solaris : Third Phase

Posted by Sagar Patil

Oracle 10g R2 RAC Installation for PROD Nodes:
Step by Step instructions for installing Oracle 10g R2 RAC installation. The procedures will provide STEP By STEP guide you for installing two nodes (prodracsrv1and prodracsrv2) and adding to the existing RAC cluster(Configuring Failover).

10g RAC Installation (Part-II Clusterware & Database Installation)

1. Install Oracle Clusterware

Mount the Clusterware dvd in the prodracsrv1 and run the runInstaller

After downloading, as the oracle user on prodracsrv1, execute

1. Welcome: Click on Next.

2. Specify Inventory directory and credentials:

o Enter the full path of the inventory directory:

/u01/app/oracle/oraInventory.

o Specify Operating System group name: oinstall.

3. Specify Home Details:

o Name: OraCrs10g_home

o /u01/app/oracle/product/10.2.0/crs_1

4. Product-Specific Prerequisite Checks:

o Ignore the warning on physical memory requirement.

5. Specify Cluster Configuration: Click on Add.

o Public Node Name: prodracsrv2.mycorpdomain.com

o Private Node Name: prodracsrv2-priv.mycorpdomain.com

o Virtual Host Name: prodracsrv2-vip.mycorpdomain.com

6. Specify Network Interface Usage:

o Interface Name: eth0

o Subnet: 192.168.2.0

o Interface Type: Public

o Interface Name: eth1

o Subnet: 10.10.10.0

o Interface Type: Private

7. Specify Oracle Cluster Registry (OCR) Location: Select External Redundancy.

For simplicity, here you will not mirror the OCR. In a production environment,

you may want to consider multiplexing the OCR for higher redundancy.

o Specify OCR Location: /u01/ocr_config

8. Specify Voting Disk Location: Select External Redundancy.

Similarly, for simplicity, we have chosen not to mirror the Voting Disk.

o Voting Disk Location: /u01/votingdisk

9. Summary: Click on Install.

10. Execute Configuration scripts: Execute the scripts below as the root user

sequentially, one at a time. Do not proceed to the next script until the current

script completes.

o Execute /u01/app/oracle/oraInventory/orainstRoot.sh on prodracsrv1.

o Execute /u01/app/oracle/oraInventory/orainstRoot.sh on prodracsrv2.

o Execute /u01/app/oracle/product/10.2.0/crs_1/root.sh on prodracsrv1.

o Execute /u01/app/oracle/product/10.2.0/crs_1/root.sh on prodracsrv2.

The root.sh script on prodracsrv2 invoked the VIPCA automatically but it failed with the

error “The given interface(s), “eth0″ is not public. Public interfaces should be

used to configure virtual IPs.” As you are using a non-routable IP address

(192.168.x.x) for the public interface, the Oracle Cluster Verification Utility

(CVU) could not find a suitable public interface. A workaround is to run VIPCA

manually.

11. As the root user, manually invokes VIPCA on the second node.

# /u01/app/oracle/product/10.2.0/crs_1/bin/vipca

Welcome: Click on Next.

Network Interfaces: Select eth0.

Virtual IPs for cluster nodes:

o Node name: prodracsrv1

o IP Alias Name: prodracsrv1-vip

o IP address: 192.168.2.31

o Subnet Mask: 255.255.255.0

o Node name: prodracsrv2

o IP Alias Name: prodracsrv2-vip

o IP address: 192.168.2.32

o Subnet Mask: 255.255.255.0

Summary: Click on Finish.

Configuration Assistant Progress Dialog: After the configuration has completed,

Click on OK.

Configuration Results: Click on Exit.

Return to the Execute Configuration scripts screen on prodracsrv1 and click on OK.

Configuration Assistants: Verify that all checks are successful. The OUI does a

Clusterware post-installation check at the end. If the CVU fails, correct the

Problem and re-run the following command as the oracle user.

prodracsrv1-> /u01/app/oracle/product/10.2.0/crs_1/bin/cluvfy stage -post crsinst -n prodracsrv1, prodracsrv2

23. Performing post-checks for cluster services setup

24.

25. Checking node reachability…

26. Node reachability check passed from node “prodracsrv1”.

27.

28. Checking user equivalence…

29. User equivalence check passed for user “oracle”.

30.

31. Checking Cluster manager integrity…

32.

33. Checking CSS daemon…

34. Daemon status check passed for “CSS daemon”.

35.

36. Cluster manager integrity check passed.

37.

38. Checking cluster integrity…

39.

40. Cluster integrity check passed

41.

42. Checking OCR integrity…

43.

44. Checking the absence of a non-clustered configuration…

45. All nodes free of non-clustered, local-only configurations.

46.

47. Uniqueness check for OCR device passed.

48.

49. Checking the version of OCR…

50. OCR of correct Version “2” exists.

51.

52. Checking data integrity of OCR…

53. Data integrity check for OCR passed.

54.

55. OCR integrity check passed.

56.

57. Checking CRS integrity…

58.

59. Checking daemon liveness…

60. Liveness check passed for “CRS daemon”.

61.

62. Checking daemon liveness…

63. Liveness check passed for “CSS daemon”.

64.

65. Checking daemon liveness…

66. Liveness check passed for “EVM daemon”.

67.

68. Checking CRS health…

69. CRS health check passed.

70.

71. CRS integrity check passed.

72.

73. Checking node application existence…

74.

75. Checking existence of VIP node application (required)

76. Check passed.

77.

78. Checking existence of ONS node application (optional)

79. Check passed.

80.

81. Checking existence of GSD node application (optional)

82. Check passed.

83.

84. Post-check for cluster services setup was successful.

85. End of Installation: Click on Exit.

2. Install Oracle Database 10g Release 2

After mounting database 10g R2 DVD run the installer

prodracsrv1-> ./runInstaller

1. Welcome: Click on Next.

2. Select Installation Type:

o Select Enterprise Edition.

3. Specify Home Details:

o Name: OraDb10g_home1

o Path: /u01/app/oracle/product/10.2.0/db_1

4. Specify Hardware Cluster Installation Mode:

o

Select the “Cluster Install” option and make sure both RAC nodes are selected, the click the “Next” button

o Select the “Install database Software only” option, then click the “Next” button.

Wait while the prerequisite checks are done. If you have any failures correct them and retry the tests before clicking the “Next” button.

7. Select the “Install database Software only” option, then click the “Next” button.

8. On the “Summary” screen, click the “Install” button to continue.

9. Wait while the database software installs.

10. Once the installation is complete, wait while the configuration assistants run.

11. Execute the “root.sh” scripts on both nodes, as instructed on the “Execute Configuration scripts” screen, then click the “OK” button.

12. When the installation is complete, click the “Exit” button to leave the installer.

Adding to the cluster

RAC Physical Standby for a RAC Primary

Overview……………………………………………………………………………………………….2

Task 1: Gather Files and Perform Back Up…………………………………………..3

Task 2: Configure Oracle Net SERVICES on the Standby……………………3

Task 3: Create the Standby Instances and Database………………………………4

Task 4: Configure The Primary Database For Data Guard……………………9

Task 5: Verify Data Guard Configuration……………………………………………10

the database unique name of the RAC database as DEVDB. The instance names of the two RAC instances are DEVDB1 (on node DEVDB_tempracsrv3) and DEVDB2 (on node DEVDB_tempracsrv4). The database unique name of the RAC standby database is PROD, and the two standby instance names are PROD1 (on node PROD_prodracsrv1) and PROD2 (on node PROD_prodracsrv2).

This document includes the following tasks:

• Task 1: Gather Files and Perform Back Up

• Task 2: Configure Oracle Net on the Standby

• Task 3: Create the Standby Instances and Database

• Task 4: Configure the Primary Database for Data Guard

• Task 5: Verify Data Guard Configuration

This document assumes that the following conditions are met:

• The primary RAC database is in archivelog mode

Creating a RAC Physical Standby for a RAC Primary

• The primary and standby databases are using a flash recovery area.

• The standby RAC hosts have existing Oracle software installation.(prodracsrv1,prodracsrv2)…..

• Oracle Managed Files (OMF) is used for all storage.

TASK 1: GATHER FILES AND PERFORM BACK UP

1. On tempracsrv3 node, create a staging directory. For example:

[oracle@DEVDB_tempracsrv3 oracle]$ mkdir -p /opt/oracle/stage

2. Create the same exact path on one of the standby hosts:

[oracle@PROD_prodracsrv1 oracle]$ mkdir -p /opt/oracle/stage

3. On the tempracsrv3 node, connect to the primary database and create a PFILE from the SPFILE in the staging directory. For example:

SQL> CREATE PFILE=’/opt/oracle/stage/initDEVDB.ora’ FROM SPFILE;

4. On the tempracsrv3 node, perform an RMAN backup of the primary database that places the backup pieces into the staging directory. For example:

[oracle@DEVDB_host1 stage]$ rman target /

RMAN> BACKUP DEVICE TYPE DISK FORMAT ‘/opt/oracle/stage/%U’ DATABASE PLUS ARCHIVELOG;

RMAN> BACKUP DEVICE TYPE DISK FORMAT ‘/opt/oracle/stage/%U’ CURRENT CONTROLFILE FOR STANDBY;

5. Place a copy of the listener.ora, tnsnames.ora, and sqlnet.ora files into the staging directory. For example:

[oracle@DEVDB_tempracsrv3 oracle]$ cp $ORACLE_HOME/network/admin/*.ora /opt/oracle/stage

6. Copy the contents of the staging directory on the RAC primary node to the standby node on which the staging directory was created on in step 2. For example:

[oracle@DEVDB_host1 oracle]$ scp /opt/oracle/stage/* \

oracle@PROD_prodracsrv1:/opt/oracle/stage

and from there copy all the dbf’s the current logfiles,standby controlfile to the according locations(Note the location should be the same location as it was in the primary).

TASK 2: CONFIGURE ORACLE NET SERVICES ON THE STANDBY

1. Copy the listener.ora, tnsnames.ora, and sqlnet.ora files from the staging directory on the standby host to the $ORACLE_HOME/network/admin directory on all standby hosts.

2. Modify the listener.ora file each standby host to contain the VIP address of that host.

Creating a RAC Physical Standby for a RAC Primary

3. Modify the tnsnames.ora file on each node, including the primary RAC nodes and standby RAC nodes, to contain all primary and standby net service names. You should also modify the Oracle Net aliases that are used for the local_listener and remote_listener parameters to point to the listener on each standby host. In this example, each tnsnames.ora file should contain all of the net service names in the following table:

Example Entries in the tnsnames.ora Files

Primary Net Service Names Standby Net Service Name
DEVDB =

(DESCRIPTION =

(ADDRESS =

(PROTOCOL = TCP)

(HOST = DEVDB_tempracsrv3vip)

(HOST = DEVDB_tempracsrv4vip)

(PORT = 1521))

(CONNECT_DATA =

(SERVER = DEDICATED)

(SERVICE_NAME = DEVDB)

)

)

PROD =

(DESCRIPTION =

(ADDRESS =

(PROTOCOL = TCP)

(HOST = PROD_prodracsrv1vip)

(HOST = PROD_prodracsrv2vip)

(PORT = 1521))

(CONNECT_DATA =

(SERVER = DEDICATED)

(SERVICE_NAME = PROD)

)

)

4. Start the standby listeners on all standby hosts.

TASK 3: CREATE THE STANDBY INSTANCES AND DATABASE

1. To enable secure transmission of redo data, make sure the primary and standby databases use a password file, and make sure the password for the SYS user is identical on every system. For example:

$ cd $ORACLE_HOME/dbs

$ orapwd file=orapwPROD password=oracle

2. Copy and rename the primary database PFILE from the staging area on all standby hosts to the $ORACLE_HOME/dbs directory on all standby hosts. For example:

[oracle@PROD_host1 stage]$ cp initDEVDB1.ora $ORACLE_HOME/dbs/initPROD1.ora

3. Modify the standby initialization parameter file copied from the primary node to include Data Guard parameters as illustrated in the following table:

Creating a RAC Physical Standby for a RAC Primary

Initialization Parameter Modifications

Parameter

Category

Before After
RAC Parameters *.cluster_database=true

*.db_unique_name=DEVDB

DEVDB1.instance_name=DEVDB1

DEVDB2.instance_name=DEVDB2

DEVDB1.instance_number=1

DEVDB2.instance_number=2

DEVDB1.thread=1

DEVDB2.thread=2

DEVDB1.undo_tablespace=UNDOTBS1

DEVDB2.undo_tablespace=UNDOTBS2

*.remote_listener=LISTENERS_DEVDB

DEVDB1.LOCAL_LISTENER=LISTENER_DEVDB_tempracsrv3

DEVDB2.LOCAL_LISTENER=LISTENER_DEVDB_tempracsrv4

*.cluster_database=true

*.db_unique_name=PROD

PROD1.instance_name=PROD1

PROD2.instance_name=PROD2

PROD1.instance_number=1

PROD2.instance_number=2

PROD1.thread=1

PROD2.thread=2

PROD1.undo_tablespace=UNDOTBS1

PROD2.undo_tablespace=UNDOTBS2

*.remote_listener=LISTENERS_PROD

PROD1.LOCAL_LISTENER=LISTENER_PROD_prodracsrv1

PROD2.LOCAL_LISTENER=LISTENER_PROD_prodracsrv2

Data Guard Parameters *.log_archive_config=’dg_config=

(PROD,DEVDB)’

*.log_archive_dest_2=’service=DEVDB

valid_for=(online_logfiles,primary_role)

db_unique_name=DEVDB’

*.standby_file_management=auto

*.fal_server=’DEVDB’

*.fal_client=’PROD’

*.service_names=’PROD’

Other parameters *.background_dump_dest=

/u01/app/oracle/admin/DEVDB/bdump

*.core_dump_dest=

/u01/app/oracle/admin/DEVDB/cdump

*.user_dump_dest=

/u01/oracle/admin/DEVDB/udump

*.audit_file_dest=

/u01/app/oracle/admin/DEVDB/adump

*.db_recovery_dest=’/u01/app/oracle/flash_recoveryarea’

*.log_archive_dest_1 =

‘LOCATION=’/u01/app/oracle/arch’

*.dispatchers=DEVDBXDB

*.background_dump_dest=

/u01/oracle/admin/PROD/bdump

*.core_dump_dest=

/u01/oracle/admin/PROD/cdump

*.user_dump_dest=

/opt/oracle/admin/PROD/udump

*.audit_file_dest=

/u01/oracle/admin/PROD/adump

*.db_recovery_dest=’/u01/app/oracle/flash_recoveryarea’

*.log_archive_dest_1=

‘LOCATION=USE_DB_RECOVERY_FILE_DEST’

*.dispatchers=PRODXDB

5. Connect to the standby database on one standby host, with the standby in the IDLE state, and create an SPFILE in the standby DATA disk group:

SQL> CREATE SPFILE=’+DATA/PROD/spfilePROD.ora’ FROM PFILE=’?/dbs/initPROD.ora’;

6. In the $ORACLE_HOME/dbs directory on each standby host, create a PFILE that is named initoracle_sid.ora that contains a pointer to the SPFILE. For example:

[oracle@PROD_prodracsrv1 oracle]$ cd $ORACLE_HOME/dbs

[oracle@PROD_prodracsrv1 dbs]$ echo spfilePROD.ora > initPROD1.ora

7. Create the dump directories on all standby hosts as referenced in the standby initialization parameter file. For example:

[oracle@PROD_prodracsrv1 oracle]$ mkdir -p $ORACLE_BASE/admin/PROD/bdump

[oracle@PROD_prodracsrv1 oracle]$ mkdir -p $ORACLE_BASE/admin/PROD/cdump

[oracle@PROD_prodracsrv1 oracle]$ mkdir -p $ORACLE_BASE/admin/PROD/udump

[oracle@PROD_prodracsrv1 oracle]$ mkdir -p $ORACLE_BASE/admin/PROD/adump

8. After setting up the appropriate environment variables on each standby host, such as ORACLE_SID, ORACLE_HOME, and PATH, start the standby database instance on the standby host that has the staging directory, without mounting the control file.

SQL> STARTUP NOMOUNT

9. From the standby host where the standby instance was just started, duplicate the primary database as a standby into the ASM disk group. For example:

$ rman target sys/oracle@DEVDB auxiliary /

RMAN> DUPLICATE TARGET DATABASE FOR STANDBY;

10. Connect to the standby database, and create the standby redo logs to support the standby role. The standby redo logs must be the same size as

the primary database online logs. The recommended number of standby redo logs is:

(maximum # of logfiles +1) * maximum # of threads

This example uses two online log files for each thread. Thus, the number of standby redo logs should be (2 + 1) * 2 = 6. That is, one more standby redo log file for each thread.

SQL> ALTER DATABASE ADD STANDBY LOGFILE THREAD 1

GROUP 5 SIZE 10M,

GROUP 6 SIZE 10M,

GROUP 7 SIZE 10M;

SQL> ALTER DATABASE ADD STANDBY LOGFILE THREAD 2

GROUP 8 SIZE 10M,

GROUP 9 SIZE 10M,

GROUP 10 SIZE 10M;

These statements create two standby log members for each group, and each member is 10MB in size. One member is created in the directory specified by the DB_CREATE_FILE_DEST initialization parameter, and the other member is created in the directory specified by DB_RECOVERY_FILE_DEST initialization parameter. Because this example assumes that there are two redo log groups in two threads, the next group is group five.

You can check the number and group numbers of the redo logs by querying the V$LOG view:

SQL> SELECT * FROM V$LOG;

You can check the results of the previous statements by querying the V$STANDBY_LOG view:

SQL> SELECT * FROM V$STANDBY_LOG;

You can also see the members created by querying the V$LOGFILE view:

SQL> SELECT * FROM V$LOGFILE;

.

11. On only one standby host (and this is your designated Redo Apply instance), start managed recovery and real-time apply on the standby database:

SQL> ALTER DATABASE RECOVER MANAGED STANDBY DATABASE USING CURRENT LOGFILE DISCONNECT;

12. On either node of the standby cluster, register the standby database and the database instances with the Oracle Cluster Registry (OCR) using the Server Control (SRVCTL) utility. For example:

$ srvctl add database -d PROD –o /u01/app/oracle/product/10.2.0/db_1

$ srvctl add instance -d PROD -i PROD1 -n PROD_prodracsrv1

$ srvctl add instance -d PROD -i PROD2 -n PROD_prodracsrv2

The following are descriptions of the options in these commands:

The -d option specifies the database unique name (DB_UNIQUE_NAME) of the database.

The -i option specifies the database insance name.

The -n option specifies the node on which the instance is running.

The -o option specifies the Oracle home of the database.

TASK 4: CONFIGURE THE PRIMARY DATABASE FOR DATA GUARD

1. Configure the primary database initialization parameters to support both the primary and standby roles.

*.log_archive_config=’dg_config=(PROD,DEVDB)’

*.log_archive_dest_2=’service=PROD

valid_for=(online_logfiles,primary_role)

db_unique_name=PROD’

*.standby_file_management=auto

*.fal_server=’PROD’

*.fal_client=’DEVDB’

*.service_names=DEVDB

Note that all the parameters listed above can be dynamically modified with the exception of the standby role parameters log_file_name_convert and db_file_name_convert. It is recommended to set the parameters with “scope=spfile” so that they can be put into effect upon the next role change.

2. Create standby redo logs on the primary database to support the standby role. The standby redo logs are the same size as the primary database online logs. The recommended number of standby redo logs is one more than the number of online redo logs for each thread. Because this example has two online redo logs for each thread, three standby redo logs are required for each thread.

SQL> ALTER DATABASE ADD STANDBY LOGFILE THREAD 1

GROUP 5 SIZE 10M,

GROUP 6 SIZE 10M,

GROUP 7 SIZE 10M;

SQL> ALTER DATABASE ADD STANDBY LOGFILE THREAD 2

GROUP 8 SIZE 10M,

GROUP 9 SIZE 10M,

GROUP 10 SIZE 10M;

These statements create two standby log members for each group, and each member is 10MB in size. One member is created in the directory specified by the DB_CREATE_FILE_DEST initialization parameter, and the other member is created in the directory specified by DB_RECOVERY_FILE_DEST initialization parameter. Because this example assumes that there are two redo log groups in two threads, the next group is group five.

You can check the number and group numbers of the redo logs by querying the V$LOG view:

SQL> SELECT * FROM V$LOG;

You can check the results of the previous statements by querying the V$STANDBY_LOG view:

SQL> SELECT * FROM V$STANDBY_LOG;

You can also see the members created by querying V$LOGFILE view:

SQL> SELECT * FROM V$LOGFILE;

TASK 5: VERIFY DATA GUARD CONFIGURATION

1. On the standby database, query the V$ARCHIVED_LOG view to identify existing files in the archived redo log. For example:

SQL> SELECT SEQUENCE#, FIRST_TIME, NEXT_TIME

FROM V$ARCHIVED_LOG ORDER BY SEQUENCE#;

2. On the primary database, issue the following SQL statement to force a log switch and archive the current online redo log file group:

SQL> ALTER SYSTEM ARCHIVE LOG CURRENT;

3. On the standby database, query the V$ARCHIVED_LOG view to verify that the redo data was received and archived on the standby database:

SQL> SELECT SEQUENCE#, FIRST_TIME, NEXT_TIME

FROM V$ARCHIVED_LOG ORDER BY SEQUENCE#;

Now we have setup a Failover instance for RAC on prodracsrv1,prodracsrv2.

RAC Build on Solaris : Second Phase

Posted by Sagar Patil

Oracle 10g R2 RAC Installation for Temp Nodes:
Step by Step instructions for installing Oracle 10g R2 RAC installation. The procedures will provide STEP by STEP guide you for installing two nodes (tempracsrv3 and tempracsrv4). Installation on this phase includes documentation on how to verify the installation and configuration is installed correctly. Step by Step instructions on creating RAC database, importing schemas from oracle 9i database into new databases, and testing database and node connectivity for this phase of the step by step instructions.

10g RAC Installation (Part-II Clusterware & Database Installation)

1. Install Oracle Clusterware

Mount the Clusterware dvd in the tempracsrv3 and run the runInstaller

After downloading, as the oracle user on tempracsrv3, execute

1. Welcome: Click on Next.

2. Specify Inventory directory and credentials:

o Enter the full path of the inventory directory:

/u01/app/oracle/oraInventory.

o Specify Operating System group name: oinstall.

3. Specify Home Details:

o Name: OraCrs10g_home

o /u01/app/oracle/product/10.2.0/crs_1

4. Product-Specific Prerequisite Checks:

o Ignore the warning on physical memory requirement.

5. Specify Cluster Configuration: Click on Add.

o Public Node Name: tempracsrv4.mycorpdomain.com

o Private Node Name: tempracsrv4-priv.mycorpdomain.com

o Virtual Host Name: tempracsrv4-vip.mycorpdomain.com

6. Specify Network Interface Usage:

o Interface Name: eth0

o Subnet: 192.168.2.0

o Interface Type: Public

o Interface Name: eth1

o Subnet: 10.10.10.0

o Interface Type: Private

7. Specify Oracle Cluster Registry (OCR) Location: Select External Redundancy.

For simplicity, here you will not mirror the OCR. In a production environment,

you may want to consider multiplexing the OCR for higher redundancy.

o Specify OCR Location: /u01/ocr_config

8. Specify Voting Disk Location: Select External Redundancy.

Similarly, for simplicity, we have chosen not to mirror the Voting Disk.

o Voting Disk Location: /u01/votingdisk

9. Summary: Click on Install.

10. Execute Configuration scripts: Execute the scripts below as the root user

sequentially, one at a time. Do not proceed to the next script until the current

script completes.

o Execute /u01/app/oracle/oraInventory/orainstRoot.sh on tempracsrv3.

o Execute /u01/app/oracle/oraInventory/orainstRoot.sh on tempracsrv4.

o Execute /u01/app/oracle/product/10.2.0/crs_1/root.sh on tempracsrv3.

o Execute /u01/app/oracle/product/10.2.0/crs_1/root.sh on tempracsrv4.

The root.sh script on tempracsrv4 invoked the VIPCA automatically but it failed with the

error “The given interface(s), “eth0″ is not public. Public interfaces should be

used to configure virtual IPs.” As you are using a non-routable IP address

(192.168.x.x) for the public interface, the Oracle Cluster Verification Utility

(CVU) could not find a suitable public interface. A workaround is to run VIPCA

manually.

11. As the root user, manually invokes VIPCA on the second node.

# /u01/app/oracle/product/10.2.0/crs_1/bin/vipca

Welcome: Click on Next.

Network Interfaces: Select eth0.

Virtual IPs for cluster nodes:

o Node name: tempracsrv3

o IP Alias Name: tempracsrv3-vip

o IP address: 192.168.2.31

o Subnet Mask: 255.255.255.0

o Node name: tempracsrv4

o IP Alias Name: tempracsrv4-vip

o IP address: 192.168.2.32

o Subnet Mask: 255.255.255.0

Summary: Click on Finish.

Configuration Assistant Progress Dialog: After the configuration has completed,

Click on OK.

Configuration Results: Click on Exit.

Return to the Execute Configuration scripts screen on tempracsrv3 and click on OK.

Configuration Assistants: Verify that all checks are successful. The OUI does a

Clusterware post-installation check at the end. If the CVU fails, correct the

Problem and re-run the following command as the oracle user.

tempracsrv3-> /u01/app/oracle/product/10.2.0/crs_1/bin/cluvfy stage -post crsinst -n tempracsrv3, tempracsrv4

23. Performing post-checks for cluster services setup

24.

25. Checking node reachability…

26. Node reachability check passed from node “tempracsrv3”.

27.

28. Checking user equivalence…

29. User equivalence check passed for user “oracle”.

30.

31. Checking Cluster manager integrity…

32.

33. Checking CSS daemon…

34. Daemon status check passed for “CSS daemon”.

35.

36. Cluster manager integrity check passed.

37.

38. Checking cluster integrity…

39.

40. Cluster integrity check passed

41.

42. Checking OCR integrity…

43.

44. Checking the absence of a non-clustered configuration…

45. All nodes free of non-clustered, local-only configurations.

46.

47. Uniqueness check for OCR device passed.

48.

49. Checking the version of OCR…

50. OCR of correct Version “2” exists.

51.

52. Checking data integrity of OCR…

53. Data integrity check for OCR passed.

54.

55. OCR integrity check passed.

56.

57. Checking CRS integrity…

58.

59. Checking daemon liveness…

60. Liveness check passed for “CRS daemon”.

61.

62. Checking daemon liveness…

63. Liveness check passed for “CSS daemon”.

64.

65. Checking daemon liveness…

66. Liveness check passed for “EVM daemon”.

67.

68. Checking CRS health…

69. CRS health check passed.

70.

71. CRS integrity check passed.

72.

73. Checking node application existence…

74.

75. Checking existence of VIP node application (required)

76. Check passed.

77.

78. Checking existence of ONS node application (optional)

79. Check passed.

80.

81. Checking existence of GSD node application (optional)

82. Check passed.

83.

84. Post-check for cluster services setup was successful.

85. End of Installation: Click on Exit.

2. Install Oracle Database 10g Release 2

After mounting database 10g R2 DVD run the installer

tempracsrv3-> ./runInstaller

1. Welcome: Click on Next.

2. Select Installation Type:

o Select Enterprise Edition.

3. Specify Home Details:

o Name: OraDb10g_home1

o Path: /u01/app/oracle/product/10.2.0/db_1

4. Specify Hardware Cluster Installation Mode:

o

Select the “Cluster Install” option and make sure both RAC nodes are selected, the click the “Next” button

o Select the “Install database Software only” option, then click the “Next” button.

Wait while the prerequisite checks are done. If you have any failures correct them and retry the tests before clicking the “Next” button.

7. Select the “Install database Software only” option, then click the “Next” button.

8. On the “Summary” screen, click the “Install” button to continue.

9. Wait while the database software installs.

10. Once the installation is complete, wait while the configuration assistants run.

11. Execute the “root.sh” scripts on both nodes, as instructed on the “Execute Configuration scripts” screen, then click the “OK” button.

12. When the installation is complete, click the “Exit” button to leave the installer.

Create a Database using the DBCA

Login to tempracsrv3 as the oracle user and start the Database Configuration Assistant.

Run the command dbca

On the “Welcome” screen, select the “Oracle Real Application Clusters database” option and click the “Next” button.

Select the “Create a Database” option and click the “Next” button.

Highlight both RAC nodes(tempracsrv3,tempracsrv4) and click the “Next” button.

Select the “Custom Database” option and click the “Next” button.

Enter the values “DEVDB.WORLD” and “DEVDB” for the Global Database Name and SID Prefix respectively, and then click the “Next” button.

Accept the management options by clicking the “Next” button. If you are attempting the installation on a server with limited memory, you may prefer not to configure Enterprise Manager at this time.

Enter database passwords then click the “Next” button.

Select the “Cluster File System” option, then click the “Next” button.

Select the “Use Oracle-Managed Files” option and enter “/u01/oradata/” as the database location, then click the “Next” button.

Check the “Specify Flash Recovery Area” option and accept the default location by clicking the “Next” button.

(ORACLE_BASE)/flash_recovery_area

Uncheck all but the “Enterprise Manager Repository” option, then click the “Standard Database Components…” button.

Uncheck all but the “Oracle JVM” option, then click the “OK” button, followed by the “Next” button on the previous screen. If you are attempting the installation on a server with limited memory, you may prefer not to install the JVM at this time.

Accept the current database services configuration by clicking the “Next” button.

Select the “Custom” memory management option and accept the default settings by clicking the “Next” button.

Accept the database storage settings by clicking the “Next” button.

Accept the database creation options by clicking the “Finish” button.

Accept the summary information by clicking the “OK” button.

Wait while the database is created.

Once the database creation is complete you are presented with the A screen. Make a note of the information on the screen and click the “Exit” button.

VERIFYING STEPS:-

$ sqlplus / as sysdba

SQL*Plus: Release 10.2.0.1.0 - Production on Tue Sep 16 12:27:11 2006

Copyright (c) 1982, 2005, Oracle.  All rights reserved.


Connected to:
Oracle Database 10g Enterprise Edition Release 10.2.0.1.0 - Production
With the Partitioning, Real Application Clusters, OLAP and Data Mining options

SQL> CONN sys/password@rac1 AS SYSDBA
Connected.
SQL> SELECT instance_name, host_name FROM v$instance;

INSTANCE_NAME    HOST_NAME
---------------- ----------------------------------------------------------------
devdb1             tempracsrv3
SQL> CONN sys/password@rac2 AS SYSDBA
Connected.
SQL> SELECT instance_name, host_name FROM v$instance;

INSTANCE_NAME    HOST_NAME
---------------- ----------------------------------------------------------------
devdb2             tempracsrv4

Importing data

Login to the EM of the RAC

http://tempracsrv3:5500/em

Using sys as sysdba

And create the required tablespace as it was in the source…

Then import the entire dump file which we did via export in the oracle 9i database one by one with the same user in which schema the data was exported.

%imp

RAC Build on Solaris : First Phase

Posted by Sagar Patil

Objective : The two Solaris 10 prod nodes have Oracle 9i databases and I  want to export database to Oracle 10g X 4 node Solaris 10 RAC.

Exporting Database (from Oracle 9i Database):-

vi export.par
userid = “sys/change_on_install as sysdba” buffer 1MB FILESIZE=750MB file=dmpfil<1-20> FULL=Y DIRECT=Y LOG=exp_full.log
At later stage create identical tables paces with enough size in the target db and then import it.

Setting up 4 Solaris 10 nodes (tempracsrv3,tempracsr4) and (prodracsrv1,prodracsrv2) with NFS setup between them

For this Type of configuration you should have two Ethernet cards in each sever ,two switches for private interconnect(for networking the second eth. i.e. eth1).

Install Solaris 10 from ISO image or CD, Hit Enter to install in graphical mode.

Skip the media test and start the installation(IF ANY)
. Language Selection: <select your language preference>.
. Keyboard Configuration: <select your keyboard preference>.
. Installation Type: Custom.
. Disk Partitioning Setup: Automatically partition. .
Hostname –enter tempracsrv3

Same way install 4 nodes namely tempracsrv4, prodrac1,prodrac2

After installation give the ip address for eth0 and eth1 as follows

For tempracsrv3
192.168.2.131 tempracsrv3.mycorpdomain.com tempracsrv3 — for eth0
192.168.2.31 tempracsrv3-vip.mycorpdomain.com tempracsrv3-vip
10.10.10.31 tempracsrv3-priv.mycorpdomain.com tempracsrv3-priv —for eth1 ( leave gateway blank)

For tempracsrv4
192.168.2.132 tempracsrv4.mycorpdomain.com tempracsrv4
192.168.2.32 tempracsrv4-vip.mycorpdomain.com tempracsrv4-vip
10.10.10.32 tempracsrv4-priv.mycorpdomain.com tempracsrv4-priv – for eth1( leave gateway blank)

Connect the network wire from the second eth on each machine to the One Gigabit Switch)—Note this is separate switch

After that verify that both ip’s are pinging from both machines.

From tempracsrv3
Ping tempracsrv4
Ping tempracsrv4-priv
Ping tempracsrv3
Ping tempracsrv3-priv

From tempracsrv4
Ping tempracsrv3
Ping tempracsrv3-priv
ping tempracsrv4
Ping tempracsrv4-priv

Ensure that everything is pinging successfully. No need to worry about the vip.

After the Installation of Solaris 10 in tempracsrv3 . Make directory u01 under / Using the following command “mkdir /u01”

Create the oracle user.

As the root user, execute
Create group, —dba ,oinstall
# /usr/sbin/groupadd oinstall
# /usr/sbin/groupadd dba
# /usr/sbin/groupadd -g 200 oinstall
# /usr/sbin/groupadd -g 201 dba
# /usr/sbin/groupadd -g 202 oper

Test
# id -a oracle
Create user—oracle(oracle software owner)…

# /usr/sbin/useradd -u 200 -g oinstall -G dba[,oper] oracle
Verify that the user nobody exists in the system.

# /usr/sbin/useradd nobody
# passwd oracle

Preventing Oracle Clusterware Installation Errors Caused by stty Commands

During an Oracle Clusterware installation, Oracle Universal Installer uses SSH (if available) to run commands and copy files to the other nodes. During the installation, hidden files on the system (for example, .bashrc or .cshrc) will cause installation errors if they contain stty commands.

To avoid this problem, you must modify these files to suppress all output on STDERR, as in the following examples:

Configuring the oracle User’s Environment

Bourne, Bash, or Korn shell:
if [ -t 0 ]; then
stty intr ^C
fi

C shell:
test -t 0
if ($status == 0) then
stty intr ^C
endif

Configuring Kernel Parameters on Solaris 10

On Solaris 10 operating systems, verify that the kernel parameters shown in the following table are set to values greater than or equal to the recommended value shown. The table also contains the resource controls that replace the /etc/system file for a specific kernel parameter. The procedure following the table describes how to verify and set the values.

Configuring Kernel Parameters

Pre-Installation Tasks

On Solaris 10, use the following procedure to view the current value specified for resource controls, and to change them if necessary:

1. To view the current values of the resource control, enter the following commands:

# id -p // to verify the project id
uid=0(root) gid=0(root) projid=1 (user.root)
# prctl -n project.max-shm-memory -i project user.root
# prctl -n project.max-sem-ids -i project user.root

2. If you must change any of the current values, then:

To modify the value of max-shm-memory to 6 GB:
# prctl -n project.max-shm-memory -v 6442450944 -r -i project user.root
To modify the value of max-sem-ids to 256:
# prctl -n project.max-sem-ids -v 256 -r -i project user.root

Use the following procedure to modify the resource control project settings, so that they persist after a system restart:

Note: In Solaris 10, you are not required to make changes to the /etc/system file to implement the System V IPC. Solaris 10 uses the resource control facility for its implementation. However, Oracle recommends that you set both resource control and /etc/system/ parameters.

Operating system parameters not replaced by resource controls continue to affect performance and security on Solaris 10 systems. For further information, contact your Sun vendor. In case you have any problem just edit the /etc/system file.

Parameter Replaced by Resource Control : Recommended value

noexec_user_stack NA 1
semsys:seminfo_semmns project.max-sem-ids 100
semsys:seminfo_semmns NA 1024
semsys:seminfo_semmsl process.max-sem-nsems 256
semsys:seminfo_semvmx NA 32767
shmsys:shminfo_shmmax project.max-shm-memory 4294967295
shmsys:shminfo_shmmin NA 1
shmsys:shminfo_shmmni project.max-shm-ids 100
shmsys:shminfo_shmseg NA 10

Note: When you use the command prctl (Resource Control) to change system parameters, you do not need to restart the system for these parameter changes to take effect. However, the changed parameters do not persist after a system restart.

Checking UDP Parameter Settings

1. By default, Oracle instances are run as the oracle user of the dba group . A project with the name group.dba is created to serve as the default project for the oracle user. Run the command id to verify the default project for the oracle user:

# su – oracle
$ id -p
uid=100(oracle) gid=100(dba) projid=100(group.dba)
$ exit

2. To set the maximum shared memory size to 2 GB, run the projmod command:

# projmod -sK “project.max-shm-memory=(privileged,2G,deny)” group.dba
Alternatively, add the resource control value  project.max-shm-memory=(privileged,2147483648,deny) to the last field of the project entries for the Oracle project.

3. After these steps are complete, check the values for the /etc/project file using the following command:

# cat /etc/project
The output should be similar to the following:
system:0::::
user.root:1::::
noproject:2::::
default:3::::
group.staff:10::::
group.dba:100:Oracle default
project:::project.max-shmmemory=(privileged,2147483648,deny)

4. To verify that the resource control is active, check process ownership, and run the commands id and prctl, as in the following example:

# su – oracle
$ id -p
uid=100(oracle) gid=100(dba) projid=100(group.dba)

$ prctl -n project.max-shm-memory -i process $$
process: 5754: -bash
NAME PRIVILEGE VALUE FLAG ACTION RECIPIENT
project.max-shm-memory
privileged 2.00GB – deny

Checking UDP Parameter Settings

The User Data Protocol (UDP) parameter settings define the amount of send and receive buffer space for sending and receiving datagrams over an IP network. these settings affect cluster interconnect transmissions. If the buffers set by these parameters are too small, then incoming UDP datagrams can be dropped due to insufficient space, which requires send-side retransmission. This can result in poor cluster performance.

On Solaris, the UDP parameters are udp_recv_hiwat and udp_xmit_hiwat. OnSolaris 10 the default values for these parameters are 57344 bytes. Oracle recommends that you set these parameters to at least 65536 bytes.

Note: For additional information, refer to the Solaris Tunable Parameters Reference Manual.

Checking the Operating System Requirements Setup with CVU. To check current settings for udp_recv_hiwat and udp_xmit_hiwat, enter the following commands:

# ndd /dev/udp udp_xmit_hiwat
# ndd /dev/udp udp_recv_hiwat

To set the values of these parameters to 65536 bytes in current memory, enter the following commands:

# ndd -set /dev/udp udp_xmit_hiwat 65536
# ndd -set /dev/udp udp_recv_hiwat 65536

To set the values of these parameters to 65536 bytes on system restarts, open the /etc/system file, and enter the following lines:

set udp:xmit_hiwat=65536
set udp:udp_recv_hiwat=65536

Checking the Hardware and Operating System Setup with CVU

/dev/dvdrom/crs/Disk1/cluvfy/runcluvfy.sh stage –post hwos –n node1,node2

Checking NFS Buffer Size Parameters

then you must set the values for the NFS buffer size parameters rsize and wsize to at least 16384. Oracle recommends that you use the value 32768. For example, if you decide to use rsize and wsize buffer settings with the value 32768, then update the /etc/vfstab file on each node with an entry similar to the following:

nfs_server:/vol/DATA/oradata /home/oracle/netapp nfs -yes
rw,hard,nointr,rsize=32768,wsize=32768,tcp,noac,vers=3

If you use NFS mounts, then Oracle recommends that you use the option forcedirectio to force direct I/O for better performance. However, if you add forcedirectio to the mount option, then the same mount point cannot be used for Oracle software binaries, executables, shared libraries, and objects. You can only use the forcedirectio option for Oracle data files, the OCR, and voting disks.

For these mount points, enter the following line:

nfs_server:/vol/DATA/oradata /home/oracle/netapp nfs -yes
rw,hard,nointr,rsize=32768,wsize=32768,tcp,noac,forcedirectio,vers=3

Create the oracle user environment file.

/export/home/oracle/.profile
export PS1=”`/bin/hostname -s`-> ”
export EDITOR=vi
export ORACLE_SID=devdb1
export ORACLE_BASE=/u01/app/oracle
export ORACLE_HOME=$ORACLE_BASE/product/10.2.0/db_1
export ORA_CRS_HOME=$ORACLE_BASE/product/10.2.0/crs_1
export LD_LIBRARY_PATH=$ORACLE_HOME/lib
export PATH=$ORACLE_HOME/bin:$ORA_CRS_HOME/bin:/bin:
/usr/bin:/usr/sbin:/usr/local/bin:/usr/X11R6/bin
umask 022

Create the filesystem directory structure. As the oracle user, execute

tempracsrv3-> mkdir -p $ORACLE_BASE/admin
tempracsrv3-> mkdir -p $ORACLE_HOME
tempracsrv3-> mkdir -p $ORA_CRS_HOME
tempracsrv3-> mkdir -p /u01/oradata/devdb

Increase the shell limits for the Oracle user. So that it has unlimited resources in the oracle user

Modify the /etc/hosts file.

# more /etc/hosts
127.0.0.1 localhost
192.168.2.131 tempracsrv3.mycorpdomain.com tempracsrv3
192.168.2.31 tempracsrv3-vip.mycorpdomain.com tempracsrv3-vip
10.10.10.31 tempracsrv3-priv.mycorpdomain.com tempracsrv3-priv
192.168.2.132 tempracsrv4.mycorpdomain.com tempracsrv4
192.168.2.32 tempracsrv4-vip.mycorpdomain.com tempracsrv4-vip
10.10.10.32 tempracsrv4-priv.mycorpdomain.com tempracsrv4-priv

Configuring SSH, Add in all the cluster.

$ ps -ef | grep sshd

Create RSA and DSA keys on each node: Complete the following steps on each node:

1. Log in as the oracle user.

2. If necessary, create the .ssh directory in the oracle user’s home directory and set the correct permissions on it:

$ mkdir ~/.ssh
$ chmod 700 ~/.ssh
$ chmod 700

3. Enter the following commands to generate an RSA key for version 2 of the SSH protocol:

$ /usr/bin/ssh-keygen -t rsa
At the prompts: Accept the default location for the key file.

Enter and confirm a pass phrase that is different from the oracle user’s password. This command writes the public key to the ~/.ssh/id_rsa.pub file and the  private key to the ~/.ssh/id_rsa file. Never distribute the private key to anyone.

4. Enter the following commands to generate a DSA key for version 2 of the SSH protocol:

$ /usr/bin/ssh-keygen -t dsa

At the prompts:

  • Accept the default location for the key file
  • Enter and confirm a pass phrase that is different from the oracle user’s password

This command writes the public key to the ~/.ssh/id_dsa.pub file and the private key to the ~/.ssh/id_dsa file. Never distribute the private key to anyone.

Add keys to an authorized key file: Complete the following steps:

1. On the local node, determine if you have an authorized key file (~/.ssh/authorized_keys). If the authorized key file already exists, then proceed to step 2. Otherwise, enter the following commands:

$ touch ~/.ssh/authorized_keys
$ cd ~/.ssh
$ ls

You should see the id_dsa.pub and id_rsa.pub keys that you have created.

2. Using SSH, copy the contents of the ~/.ssh/id_rsa.pub and ~/.ssh/id_dsa.pub files to the file ~/.ssh/authorized_keys, and provide the Oracle user password as prompted. This process is illustrated in the following syntax example with a two-node cluster, with nodes node1 and node2, where the Oracle user path is /home/oracle:

[oracle@node1 .ssh]$ ssh node1 cat /home/oracle/.ssh/id_rsa.pub >>
authorized_keys
oracle@node1’s password:
[oracle@node1 .ssh]$ ssh node1 cat /home/oracle/.ssh/id_dsa.pub >>
authorized_keys
[oracle@node1 .ssh$ ssh node2 cat /home/oracle/.ssh/id_rsa.pub >>
authorized_keys
oracle@node2’s password:
[oracle@node1 .ssh$ ssh node2 cat /home/oracle/.ssh/id_dsa.pub
>>authorized_keys
oracle@node2’s password:

3. Use SCP (Secure Copy) or SFTP (Secure FTP) to copy the authorized_keys file  to the Oracle user .ssh directory on a remote node. The following example is with SCP, on a node called node2, where the Oracle user path is /home/oracle:

[oracle@node1 .ssh]scp authorized_keys node2:/home/oracle/.ssh/

Note: Repeat this process for each node in the cluster.

Creating Required Operating System Groups and User

Pre-Installation Tasks

4. Repeat step 2 and 3 for each cluster node member. When you have added keys from each cluster node member to the authorized_keys file on the last node you want to have as a cluster node member, then use SCP to copy the complete authorized_keys file back to each cluster node member

5. Change the permissions on the Oracle user’s /.ssh/authorized_keys file on all cluster nodes:

$ chmod 600 ~/.ssh/authorized_keys

At this point, if you use ssh to log in to or run a command on another node, you are prompted for the pass phrase that you specified when you created the DSA key.

Enabling SSH User Equivalency on Cluster Member Nodes

To enable Oracle Universal Installer to use the ssh and scp commands without being prompted for a pass phrase, follow these steps:

1. On the system where you want to run Oracle Universal Installer, log in as the oracle user.

2. Enter the following commands:

$ exec /usr/bin/ssh-agent $SHELL
$ /usr/bin/ssh-add

3. At the prompts, enter the pass phrase for each key that you generated. If you have configured SSH correctly, then you can now use the ssh or scp commands without being prompted for a password or a pass phrase.

4. If you are on a remote terminal, and the local node has only one visual (which is typical), then use the following syntax to set the DISPLAY environment Variable:

Bourne, Korn, and Bash shells
$ export DISPLAY=hostname:0
C shell:
$ setenv DISPLAY 0
For example, if you are using the Bash shell, and if your hostname is node1, then enter the following command:
$ export DISPLAY=node1:0

5. To test the SSH configuration, enter the following commands from the same terminal session, testing the configuration of each cluster node, where tempracsrv3, tempracsrv4, and so on, are the names of nodes in the cluster:

$ ssh tempracsrv3 date
$ ssh tempracsrv4 date

Note: The Oracle user’s /.ssh/authorized_keys file on every node must contain the contents from all of the /.ssh/id_rsa.pub and /.ssh/id_dsa.pub files that you generated on all cluster nodes.

These commands should display the date set on each node. If any node prompts for a password or pass phrase, then verify that the ~/.ssh/authorized_keys file on that node contains the correct public keys. If you are using a remote client to connect to the local node, and you see a message similar to “Warning: No xauth data; using fake authentication data for X11 forwarding,” then this means that your authorized keys file is configured correctly, but your ssh configuration has X11 forwarding enabled. To correct this, proceed to step 6.

6. To ensure that X11 forwarding will not cause the installation to fail, create a user-level SSH client configuration file for the Oracle software owner user, as follows:

a. Using any text editor, edit or create the ~oracle/.ssh/config file.

b. Make sure that the ForwardX11 attribute is set to no. For example:

Host *
ForwardX11 no

Note: The first time you use SSH to connect to a node from a particular system, you may see a message similar to the following: The authenticity of host ‘node1 (140.87.152.153)’ can’t be established.

RSA key fingerprint is
7z:ez:e7:f6:f4:f2:4f:8f:9z:79:85:62:20:90:92:z9.
Are you sure you want to continue connecting (yes/no)?

Enter yes at the prompt to continue. You should not see this message again when you connect from this system to that node. If you see any other messages or text, apart from the date, then the installation can fail. Make any changes required to ensure that only the date is displayed when you enter these commands. You should ensure that any parts of login scripts that generate any output, or ask any questions, are modified so that they act only when the shell is an interactive shell.

At Ttempracsrv3

Create NFS mount point /u01. Create directory using following command Mkdir /u01

1. enable NFS sever by running the following:
svcadm -v enable -r network/nfs/server

3. Run the following command to share via NFS
share -F nfs -o rw /u01
Note: The above share command will not persist over reboots. To persist over reboots, add an entry to /etc/dfs/dfstab

At Tempracsrv4

4. Run the following command to mount from tempracsrv4: mount -F nfs tempracsrv3:/u01 /u01
Note: The above mount command will not persist over reboots. To persist over reboots, add the following line in /etc/vfstab:

tempracsrv3:/u01 – /u01 nfs – yes rw,soft

Now copy the first machine as we did for tempracsrv4 and configure it as temprac1,temprac2.(for failover).also configure /u02 as nfs in temprac1, and mount it in temprac2.

creating blank files which will be used later for placing voting disk and ocr

touch /u01/crs_config
touch /u01/voting_disk

Now configure prodrac1,prodrac2 as we did for tempracsrv3,tempracsrv4.(for failover).

Change the sid in .bash_profile from devdb to prod. Use the following ip’s for prodrac1,prodrac2

127.0.0.1 localhost
192.168.2.133 prodrac1.mycorpdomain.com prodrac1— eth0 on prodrac1
192.168.2.34 prodrac1-vip.mycorpdomain.com prodrac1-vip
10.10.10.33 prodrac1-priv.mycorpdomain.com prodrac1-priv –eth1 on prodrac1
192.168.2.133 prodrac2.mycorpdomain.com prodrac2—eth0 on prodrac2
192.168.2.34 prodrac2-vip.mycorpdomain.com prodrac2-vip
10.10.10.34 prodrac2-priv.mycorpdomain.com prodrac2-priv—eth1 on prodrac2

RAC Build on Solaris, Step-By-Step

Posted by Sagar Patil

The scope of this STEP By STEP documentation will include the following workflow:

*First Phase*
The two prod nodes have Oracle 9i databases and we want to export the database to oracle 10g RAC. Step by Step export instructions for creating a backup copy of databases. Step By Step instruction on how to install new OS version of Sun Solaris 10 to replace Sun Solaris 9.

Setting Up nodes
Step by Step documentation for setting up 4 Sun Solaris 10 nodes. This portion needs to include Step by Step instructions for NFS setup. Also include step by step instructions to verify connectivity.

*Second Phase*
Oracle 10g R2 RAC Installation for Temp Nodes:
Step by Step instructions for installing Oracle 10g R2 RAC installation. The procedures will provide STEP by STEP guide you for installing two nodes (tempracsrv3 and tempracsrv4). Installation on this phase includes documentation on how to verify the installation and configuration is installed correctly. Step by Step instructions on creating RAC database, importing schemas from oracle 9i database into new databases, and testing database and node connectivity for this phase of the step by step instructions.

*Third Phase*
Oracle 10g R2 RAC Installation for PROD Nodes:
Step by Step instructions for installing Oracle 10g R2 RAC installation. The procedures will provide STEP By STEP guide you for installing two nodes (prodracsrv1and prodracsrv2) and adding to the existing RAC cluster.

*Fourth Phase*
Step by Step instructions on how to fail RAC databases over from temp nodes to prod nodes. Includes step by step instructions on how to verify the failover from temp nodes to prod nodes. Step by Step instructions on how to test RAC database connectivity after failover.

*Fifth Phase*
Step by Step instructions on how to remove temp nodes from RAC cluster. Step by step instruction on how to verify removal of temp nodes.

FAN (Fast Application Notification) & ONS (Oracle Notification Services)

Posted by Sagar Patil

Read more…

How does the failover mechanism work?

Posted by Sagar Patil

Read more…

TAF can be verified by querying the Oracle-provided views

Posted by Sagar Patil

Read more…

Get the current Session ID

Posted by Sagar Patil

SQL> desc v$mystat
Name Null? Type
—————————————– ——– —————————-
SID NUMBER
STATISTIC# NUMBER
VALUE NUMBER

SQL> select distinct sid from v$mystat;

SID
———-
139

SQL> select sid, serial# from v$session
2 where audsid=SYS_CONTEXT(‘USERENV’,’SESSIONID’);

SID SERIAL#
———- ———-
139 6

SQL> select dbms_session.unique_session_id from dual;

UNIQUE_SESSION_ID
——————————————————————————–
008B00060001

Identify Master node in RAC cluster

Posted by Sagar Patil

1. Grep occsd Log file
[oracle @ tadrac1]: /u1/app/../cssd >grep -i “master node” ocssd.log | tail -1
[CSSD]CLSS-3001: local node number 1, master node number 1

2. Grep crsd log file
[oracle @ tadrac1]: /u1/app/../crsd>grep MASTER crsd.log | tail -1

3. Query V$GES_RESOURCE view

4. ocrconfig -showbackup
The node that store OCR backups is the master node.

The role of the master node is basically that this is the node where other “clients”/nodes will contact to get information about node status… ect.

The rule is like this.
-> the first node in a cluster to be up will become the master node. -> and/or the node with the lowest number will become the master node. Information about who is the master can be found in the cssd logfile. Check for reconfiguration information at the end of the reconfiguration.

Bring Cluster Online/Offline

Posted by Sagar Patil

Step A> Sequence of events to pull cluster database down..

1. Bring down load balanced/TAF service
srvctl stop service -d orcl -s RAC

2. Stop RAC instances using
srvctl stop instance -d (database) -I (instance)

3. If needed stop ASM instnace using
srvctl stop asm -n (node)

4. Stop all services using
srvctl stop -nodeapps

Step B> Sequence of events to bring cluster database back..

1. Start all services using
srvctl start -nodeapps

2. Start ASM instnace using
srvctl start asm -n (node)

3. Start RAC instances using
srvctl start instance -d (database) -I (instance)

4. Finish up by bringing our load balanced/TAF service online
srvctl start service -d orcl -s RAC

Managing CRS/ Commands

Posted by Sagar Patil

CRS DAEMON FUNCTIONALITY

CRSD: Performs high availability recovery and management operations such as maintaining the OCR and managing application resources.
– Engine for HA operation
– Manages ‘application resources’
– Starts, stops, and fails ‘application resources’ over
– Spawns separate ‘actions’ to start/stop/check application resources
– Maintains configuration profiles in the OCR (Oracle Configuration Repository)
– Stores current known state in the OCR.
– Runs as root
– Is restarted automatically on failure

OCSSD:
– OCSSD is part of RAC and Single Instance with ASM
– Provides access to node membership
– Provides group services
– Provides basic cluster locking
– Integrates with existing vendor clusteware, when present
– Can also runs without integration to vendor clustware
– Runs as Oracle.
– Failure exit causes machine reboot.
— This is a feature to prevent data corruption in event of a split brain.

EVMD: Event manager daemon. This process also starts the racgevt process to manage FAN server callouts.
– Generates events when things happen
– Spawns a permanent child evmlogger
– Evmlogger, on demand, spawns children
– Scans callout directory and invokes callouts.
– Runs as Oracle.
– Restarted automatically on failure

RESOURCE STATUS
Status of the database, all instances and all services

srvctl status database -d ORACLE -v

Status of named instances with their current services.

srvctl status instance -d ORACLE -i RAC01, RAC02 -v

Status of a named services

srvctl status service -d ORACLE -s ERP -v

Status of all nodes supporting database applications

srvctl status node

START RESOURCES
Start the database with all enabled instances

srvctl start database -d ORACLE

Start named instances

srvctl start instance -d ORACLE -i RAC03, RAC04

Start named services. Dependent instances are started as needed

srvctl start service -d ORACLE -s CRM

Start a service at the named instance

srvctl start service -d ORACLE -s CRM -i RAC04

Start node applications

srvctl start nodeapps -n myclust-4

STOP RESOURCES
Stop the database, all instances and all services

srvctl stop database -d ORACLE

Stop named instances, first relocating all existing services

srvctl stop instance -d ORACLE -i RAC03,RAC04

Stop the service

srvctl stop service -d ORACLE -s CRM

Stop the service at the named instances

srvctl stop service -d ORACLE -s CRM -i RAC04

Stop node applications. Note that instances and services also stop

srvctl stop nodeapps -n myclust-4

ADD RESOURCES

Add a new node

srvctl add nodeapps -n myclust-1 -o $ORACLE_HOME –A 139.184.201.1/255.255.255.0/hme0

Add a new database

srvctl add database -d ORACLE -o $ORACLE_HOME

Add named instances to an existing database

srvctl add instance -d ORACLE -i RAC01 -n myclust-1
srvctl add instance -d ORACLE -i RAC02 -n myclust-2
srvctl add instance -d ORACLE -i RAC03 -n myclust-3

Add a service to an existing database with preferred instances (-r) and available instances (-a). Use basic failover to the available instances

srvctl add service -d ORACLE -s STD_BATCH -r RAC01,RAC02 -a RAC03,RAC04

Add a service to an existing database with preferred instances in list one and available instances in list two. Use preconnect at the available instances

srvctl add service -d ORACLE -s STD_BATCH -r RAC01,RAC02 -a RAC03,RAC04 -P PRECONNECT

REMOVE  RESOURCES
Remove the applications for a database.
srvctl remove database -d ORACLE
Remove the applications for named instances of an existing database.
srvctl remove instance -d ORACLE -i RAC03
srvctl remove instance -d ORACLE -i RAC04
Remove the service.
srvctl remove service -d ORACLE -s STD_BATCH
Remove the service from the instances.
srvctl remove service -d ORACLE -s STD_BATCH -i RAC03,RAC04
Remove all node applications from a node.
srvctl remove nodeapps -n myclust-4

MODIFY RESOURCES
Modify an instance to execute on another node.
srvctl modify instance -d ORACLE -n my

Summary report of ASM disk groups and Space Utilised

Posted by Sagar Patil

PURPOSE : Provide a summary report of all disk groups.

SET LINESIZE 145
SET PAGESIZE 9999
SET VERIFY off

COLUMN group_name FORMAT a20 HEAD ‘Disk Group|Name’
COLUMN sector_size FORMAT 99,999 HEAD ‘Sector|Size’
COLUMN block_size FORMAT 99,999 HEAD ‘Block|Size’
COLUMN allocation_unit_size FORMAT 999,999,999 HEAD ‘Allocation|Unit Size’
COLUMN state FORMAT a11 HEAD ‘State’
COLUMN type FORMAT a6 HEAD ‘Type’
COLUMN total_mb FORMAT 999,999,999 HEAD ‘Total Size (MB)’
COLUMN used_mb FORMAT 999,999,999 HEAD ‘Used Size (MB)’
COLUMN pct_used FORMAT 999.99 HEAD ‘Pct. Used’

break on report on disk_group_name skip 1
compute sum label “Grand Total: ” of total_mb used_mb on report

SELECT   name group_name,
sector_size sector_size,
block_size block_size,
allocation_unit_size allocation_unit_size,
state state,
TYPE TYPE,
total_mb total_mb,
(total_mb – free_mb) used_mb,
ROUND ( (1 – (free_mb / total_mb)) * 100, 2) pct_used
FROM   v$asm_diskgroup
ORDER BY   name

Sample Report

Disk Group Sector Block Allocation
Name Size Size Unit Size State Type Total Size (MB) Used Size (MB) Pct. Used
——————– ——- ——- ———— ———– —— ————— ————– ———
XYZ_REDO_DG01 512 4,096 16,777,216 MOUNTED EXTERN 28,144 9,424 33.48
ABC_ARCH_DG00 512 4,096 16,777,216 MOUNTED EXTERN 225,216 28,656 12.72
ABC_DATA_DG00 512 4,096 16,777,216 MOUNTED EXTERN 450,432 88,800 19.71
ABC_FLBK_DG00 512 4,096 16,777,216 MOUNTED EXTERN 112,608 4,848 4.31
ABC_REDO_DG00 512 4,096 16,777,216 MOUNTED EXTERN 28,128 9,584 34.07
ABC_REDO_DG01 512 4,096 16,777,216 MOUNTED EXTERN 28,128 9,456 33.62
————— ————–
Grand Total: 4,448,192 2,110,496

Performance summary report of all disks contained within all ASM DiskGroups

Posted by Sagar Patil

— +—————————————————————————-+
— | Jeffrey M. Hunter |
— |—————————————————————————-|
— | PURPOSE : Provide a summary report of all disks contained within all ASM |
— | disk groups along with their performance metrics. |
— | NOTE : As with any code, ensure to test this script in a development |
— | environment before attempting to run it in production. |
— +—————————————————————————-+

SET LINESIZE 145
SET PAGESIZE 9999
SET VERIFY off

COLUMN disk_group_name FORMAT a20 HEAD ‘Disk Group Name’
COLUMN disk_path FORMAT a20 HEAD ‘Disk Path’
COLUMN reads FORMAT 999,999,999 HEAD ‘Reads’
COLUMN writes FORMAT 999,999,999 HEAD ‘Writes’
COLUMN read_errs FORMAT 999,999 HEAD ‘Read|Errors’
COLUMN write_errs FORMAT 999,999 HEAD ‘Write|Errors’
COLUMN read_time FORMAT 999,999,999 HEAD ‘Read|Time’
COLUMN write_time FORMAT 999,999,999 HEAD ‘Write|Time’
COLUMN bytes_read FORMAT 999,999,999,999 HEAD ‘Bytes|Read’
COLUMN bytes_written FORMAT 999,999,999,999 HEAD ‘Bytes|Written’

break on report on disk_group_name skip 2

compute sum label “” of reads writes read_errs write_errs read_time write_time bytes_read bytes_written on disk_group_name
compute sum label “Grand Total: ” of reads writes read_errs write_errs read_time write_time bytes_read bytes_written on report

SELECT
a.name disk_group_name
, b.path disk_path
, b.reads reads
, b.writes writes
, b.read_errs read_errs
, b.write_errs write_errs
, b.read_time read_time
, b.write_time write_time
, b.bytes_read bytes_read
, b.bytes_written bytes_written
FROM
v$asm_diskgroup a JOIN v$asm_disk b USING (group_number)
ORDER BY
a.name
/

Mastering ASMCMD

Posted by Sagar Patil

cd Changes the current directory to the specified directory.

duDisplays the total disk space occupied by ASM files in the specified ASM directory and all its subdirectories, recursively.

exit Exits ASMCMD.

find Lists the paths of all occurrences of the specified name (with wildcards) under the specified directory.
ASMCMD> find +dgroup1 undo* +dgroup1/SAMPLE/DATAFILE/UNDOTBS1.258.555341963 +dgroup1/SAMPLE/DATAFILE/UNDOTBS1.272.557429239

The following example returns the absolute path of all the control files in the
+dgroup1/sample directory.ASMCMD> find -t CONTROLFILE +dgroup1/sample * +dgroup1/sample/CONTROLFILE/Current.260.555342185 +dgroup1/sample/CONTROLFILE/Current.261.555342183

ls Lists the contents of an ASM directory, the attributes of the specified file, or the names and attributes of all disk groups.

lsct Lists information about current ASM clients.

lsdg Lists all disk groups and their attributes.

mkalias Creates an alias for a system-generated filename.

mkdir Creates ASM directories.

pwd Displays the path of the current ASM directory.

rm Deletes the specified ASM files or directories.

rmalias Deletes the specified alias, retaining the file that the alias points to.

Top of Page

Top menu